Articles | Photoshop blog | Photography blog | about me | e-mail

Helen Bradley - MS Office Tips, Tricks and Tutorials

I'm a lifestyle journalist and I've been writing about office productivity software for a long time. Here you'll find handy hints, tips, tricks, techniques and tutorials on using software as diverse as Excel, Word, PowerPoint, Outlook, Access and Publisher from Microsoft and other applications that I love. My publishing credits include PC Magazine, Windows XP mag, CNet, PC User mag, SmallbusinessComputing.com, Winplanet and Sydney Morning Herald.

Thursday, May 31, 2007

Haven't I said this before?


Ever get that sense of deja vu - you've said this before.. oh so many times? Office has never had a good tool for managing blocks of text that you use repeatedly. The is AutoText and AutoCorrect but they're not highly visible or intuitive. In Office 2007 another tool is thrown into the mix. The jury is out on whether this is a good thing or just another option that isn't properly thought our or implemented. Anyway, it's worth testing out to see if it works for you. BTW the technical term for text you use over and over again is boilerplate text... not sure why, but there it is!

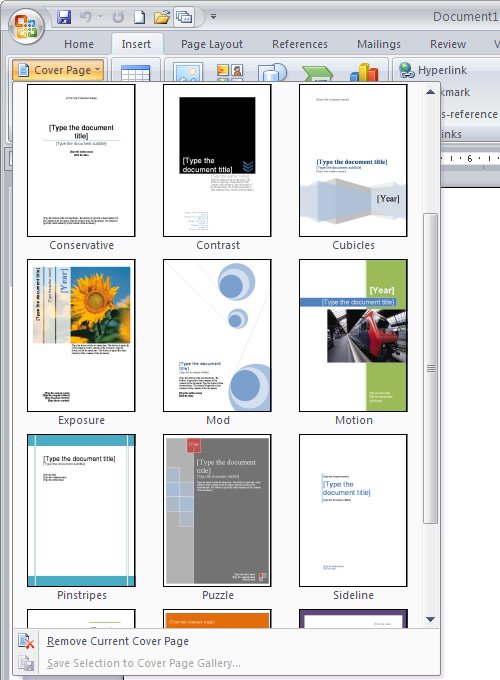
In Word, for example, type and select the text that you use a lot and, on the Insert tab choose the Quick Part option. You can save the text and later insert it using the same tool - it's kinda nice that the tool shows you the full text before you insert it.

Interestingly the same feature is available in Outlook 2007 where it just might be a litte bit more use.

Labels: , , ,

Add to Technorati Favorites

Wednesday, May 30, 2007

Are you free? Add a calendar to an Outlook 2007 email

I need to meet with you. I know when I'm free I don't know when you are. To avoid the "Can you do it this time?" "No. What about?" discussion you can send an outgoing email with your calendar in it so your recipient can see when you're free and plan accordingly.

The proviso for this is you need to be using Microsoft Exchange so it's the sort of thing you can do at work but unlikely you will be running exchange at home. To do this, in a new message dialog, click the Insert tab and select Calendar. You can then choose just how much calendar to send, just your available spaces or everything... it's up to you.

Labels: ,

Add to Technorati Favorites

Tuesday, May 29, 2007

Axe the Mini toolbar


If you don't like the new mini toolbar that appears when you right click something in an Office 2007 document, you can axe it. You can't customize it, you can't add or remove anything from it but you can zap it.

In Word 2007, PowerPoint 2007and Excel 2007 you do this by clicking the Office button and choose the Options link at the foot of the dialog. In the Popular group you will disable the Show Mini Toolbar on selection checkbox.

The steps are a little different in Outlook 2007 in Outlook, you need to open an element that uses the new Ribbon interface such as a new message window. Now click the Office button, Editor Options and disable the Show Mini Toolbar on selection checkbox.

If you want it back at any time, just reverse the process.

Labels: ,

Add to Technorati Favorites

Friday, May 25, 2007

Copying Styles in Word


If you often work on documents that need to use custom styles, you can easily copy the styles from one document to another - if you know how. Since you're reading this, you're about to be invited into the inner circle of knowledge.

So, start with the document open into which you want to copy the styles. Choose Tools, Macro, Macros, Organizer - yep! sounds weird but it works!

Now click the Close file button on the right to close Normal.dot and then click Open File and browse to find the file to copy the styles from. If this is a regular file and not a template, you'll have to select the correct file type from the Files of Type list. When you open your file, click the Styles tab and you can select and copy styles from one document to the other. Simple when you know how?

Labels: ,

Add to Technorati Favorites

Thursday, May 24, 2007

Showing the Styles pane in Word 2007


The Styles task pane in Word is a handy way of tracking what styles are applied to a paragraph and for formatting text with styles. You might be wondering if the Styles task pane is totally missing it in Word 2007. Don't worry - it is still there, you just have to find it.

Click the Home tab and locate the Styles group. Click the indicator in the bottom right corner to open the Styles dialog - voila! just what you need. To dock it so it sits permanently on the right of the screen, double click its title bar. You can also display it by pressing Control + Alt + Shift + S.

Labels: ,

Add to Technorati Favorites

Wednesday, May 23, 2007

Quick moves in Word

As an extension to yesterday’s tip my preference for moving items around a Word document is to hold the Shift and Alt keys together and to use the Up and Down arrow keys.

This moves a paragraph up and down a document or, if you have more than one paragraph selected, it moves all of them up and down a document.

If you do this inside a table you move the table row up and down the table - neat but there's more to come. If the table row moves past the top of a table it is broken out of the table and it becomes a table all of its own. Move some table rows from one table down into another table and they’re automatically incorporated into the second table. It’s an amazingly simple yet effective way of moving things around a Word document.

Labels: , ,

Add to Technorati Favorites

Tuesday, May 22, 2007

Quick moves in Excel

My friend Theda and I were talking the other day about a project she’s working on where she has to reorder a lot of items into alphabetical order and, in some cases, an order which is not alphabetical.

While she is doing the project in Microsoft Excel there are, of course, difficulties in Excel in moving items around as Excel does not, by default, open up a row when you choose to move an item from one part of the worksheet to another - instead, Excel thinks you want to overwrite the target cells - as if!

There is, however, a way to do this which opens up the space for the new row and which closes up the space that you have just made available. To do this select an entire row or range of rows in Excel by clicking on the row number or numbers. Hold your mouse over the dark outline around the rows and hold the Shift key as you drag the rows to their new position. The empty space that you have created will be closed up and a new space will be created between the other two rows for your item.

Problem solved!

Labels: , ,

Add to Technorati Favorites

Monday, May 21, 2007

Put a button on an Excel worksheet


I love the form tools in Excel they let you do so many cool things. One thing I love to do is to make buttons run my macros. To do this, use the Forms toolbar, click the Button tool and drag to create a button on the worksheet. When you do, a dialog appears with all your macros listed so you can select the one to use. You can also edit the text on the button and when you're done simply click it to run the macro - sweet huh?

If you're using Excel 2007 you have to add the button tool to your Quick Access toolbar (it's in the Commands Not In The Ribbon group and it's called Button (Form Control).

Labels: , , ,

Add to Technorati Favorites

Friday, May 18, 2007

Cover Pages to Go - Word 2007


There's a lot to love about the new Word 2007 and one of those things is the new Cover Pages tool. Cover pages are an all important introduction to your documents - they sit on the front of your document and they're the first thing someone sees when they view your work. They should say all sorts of things about your professionalism and your style. If they're plain and dull, they (and you) deserve better. Now there's no excuse for plain ol' cover pages.

When you're next in the market to create a document of any more than two or three pages, check out the Cover Pages options. Click the Insert tab and choose Cover Pages. A gallery opens up and you can choose the page of your liking. It appears as a new first page for your document complete with places already marked into which you can type your information. Click and type and you're done - simple, effective and a 'must have' solution for better business documents.

Labels: ,

Add to Technorati Favorites

Thursday, May 17, 2007

Languages and Word 2007


I write articles for magazines all over the world. One day I’ll wake up and think Canadian and other times I’m English or an Aussie or American.

Each country spells differently, it can be color or colour or honor or honour and there are really tricky ones like dialing and dialling. To help out, I use the Language options in Word. It used to be easy in Word 2003, select the document using Control + A, and apply the language to it using the Tools options.

I spent a horrible amount of time in Word 2007 en-route to New Jersey recently looking for the Language tool. Yikes, could not find it anywhere. Ring the alarm bells, I need this feature. My solution, use the Customize tool and add the Language option to the Quick Access toolbar. Now it’s where you want it, handy and accessible. Bummer it can’t be found on the Ribbon anywhere but at least this now works and probably it's better than even in Word 2003.

Labels: , ,

Add to Technorati Favorites

Wednesday, May 16, 2007

Camera Icon in Excel 2007


Hi Jim from Calgary!

Jim wrote and asked, "I’ve been using the camera icon for years and I can’t find it in Excel 2007. Can you see it anywhere?"

He also said, "nice blog thanks" - so anyone that nice deserves an answer.

So, Jim, don't go looking for the camera on the Ribbon it isn't there. You probably already know you can't customize the Ribbon either so you can't put it just anywhere you like - thanks Microsoft! You're limited to the Quick Access toolbar - that little bar to the right of the Office button. Click the down arrow to its immediate right and choose More Commands. From the Choose Commands From list choose 'Commands Not in the Ribbon' (that's how I figure it probably isn't on the ribbon), and then locate the Camera. Click it and click Add. Then click Ok. Now the camera is on the Quick Access Toolbar and it works as it always used to - least so far as I can see.

If you've now got a great new camera icon on your toolbar but you don't know what to do with it, then visit my Snap an Excel range blog entry to find out...

Labels: , ,

Add to Technorati Favorites

Tuesday, May 15, 2007

Grid and Guides in PowerPoint 2007


If you're like me you like to have everything neatly aligned on your PowerPoint slides. If you don't, a slide with navigation and action buttons can very quickly become very untidy.

To line everything up, you need to be able to see the gridlines. Gridlines on a PowerPoint slide? I hear you ask. Why not?

To see the gridlines, right click an empty area on a slide and choose Grid and Guides. Select the Display Grid on Screen checkbox and configure the grid size and click Ok. You can also display drawing guides using the same dialog. By default these are placed in the middle of the slide horizontally and vertically.

To add a new guide, hold the Control key as you drag a new guide from an existing one.

Reverse the process to hide the guides and grids when you're done.

Labels: , ,

Add to Technorati Favorites

Monday, May 14, 2007

Never miss a trick with Outlook 2007


I often get emails that need attention such as a tip that a reader sends in for an column I write in the Sydney Morning Herald that I like and plan to use in an upcoming column - just not now. I flag it by right clicking and choose Follow Up and then a flag, like this week, next week, no date etc..

Having done that, the item appears automatically in my Outlook 2007 to do list so, provided the To do bar is showing, it's there and I can check the items and find the tip whenever I need it. Combine follow up with color categories and you're set. When you're done with an item, right click it in the To Do bar and mark it as complete and it disappears.

Seriously, the To Do bar has the ability at last to be some use in Outlook 2007 so it's time to begin using some behaviors that will make it work for you.

Labels: , ,

Add to Technorati Favorites

Friday, May 11, 2007

Working between Office 2007 & 2003


If you're using Office 2007 in a workgroup with others who are 2003 users, then you'll encounter problems with them not being able to read your 2007 documents.

The simple solution is to change the default save format in the Office 2007 applications so they save automatically in the older formats. To do this, click the Office button and choose the Word Options button (for example), and click the Save option. In the dropdown list, Configure the Save files in this format option to the 97-2003 format.

You'll need to do this separately for each application you want to change the default save format for.

Of course, this doesn't stop you from saving in the new format or any other supported format. It just ensures that the default save format is backwardly compatible with other users.

Labels: , , ,

Add to Technorati Favorites

Thursday, May 10, 2007

PDF Writer for Office 2007 - free!


Why would you go to all the trouble of creating Office 2007, packaging it into a cute box and then leave some of the best bits out? Ask Microsoft because I sure as heck don't understand it. In the past they've left out Producer for PowerPoint, options in Excel and now, in Office 2007, the PDF writer. Seriously - it's silly and it's sad 'cause lots of folks don't know that these tools are there so they struggle along without them or worse still, go and pay for something they could have had for free.

So, in the interests of getting the word out, here's a download link for the PDF writer for Office 2007. Grab it, install it and use it.. you're entitled to it.

Labels: , ,

Add to Technorati Favorites

Wednesday, May 9, 2007

Speed up slow ol' Outlook 2007

Ok, so Outlook 2007 is running like a dog. It's slow and cumbersome to use. Microsoft has admitted it and pointed a finger at overlarge .PST files. One wonders why Microsoft persists in forcing hapless users to jam all their emails (plus attachments) and RSS feeds into one .PST file anyway. Heaven help the new user who plain doesn't understand what a .PST file is anyway, much less why it affects their system performance.

Until the folks at Redmond come to their collective senses and offer us an alternative solution, your options are to work around it. Split your emails into multiple .PST files by archiving them and keep your main .PST file at a small size.

Here are Microsoft's current series of recommendations for speeding up Outlook 2007, it's a KnowledgeBase article, and here's a link to an update for Outlook that promises to fix some of the speed issues: Microsoft Outlook 2007 update download site.

I just have to have the final word here... why, in 2007, should are we still bothered by this stuff?

Labels: , ,

Add to Technorati Favorites

Tuesday, May 8, 2007

Text on a chart, Excel


It's easy enought to place a title or Y and X axis titles on a chart but what about a note or comment?


The secret is in the Drawing tools. Display the Drawing toolbar and click on the Text Box button. Now you can drag a text box on your chart and add text inside it. Size it, format it and you're off.


Labels: , ,

Add to Technorati Favorites

Monday, May 7, 2007

Circular images in Word


I love this tip. It's so much fun and so unexpected that you can do it. In fact, I've been working a lot lately on funky graphics stuff in Word so expect to see more in future. It seems like the fewer tools they give us the more I want to make them work for me.

So, here we go. Open a Word document and, from the Drawing toolbar, click the Oval tool and draw a circle on the page. Click the shape, right click, choose Format AutoShape and click the Colors and Lines tab. From the Fill Color dropdown list choose Fill Effects then the Picture tab. Then click Select Picture and locate and open your image by clicking Insert. Click the Lock picture aspect ratio checkbox and click Ok twice. It sounds complicated but it’s really pretty easy to do and the results.. well they’re great.

Better still, you can use any shape – it doesn’t have to be a circle… any of the AutoShapes will do.

Labels: , ,

Add to Technorati Favorites

Friday, May 4, 2007

Reuse a Chart's "Look"


Sometimes you'll create a chart that just looks so good you want to save the 'look' so you can use it again. You can do this by turning your chart into a template. This would be a technique you could use if you were creating a report and you need to use multiple charts that are all formatted in a similar way.


To save a chart as a template, first display or create the chart and select it. On the Chart Tools, Design tab, choose Save As Template in the Type group. In the Save In box check you're using the Charts folder and type a name for your template and click Save. Later, to apply the template, to a chart you're about to create, select your data the Insert tab, click the Other Charts button to open the list and choose All Chart Types. Choose Templates and then the template you just saved. If you already have a chart created, click the chart and click the Design tab, then Change Chart Type. Click Templates, then click the template to use from the My Templates area.


You can store lots of templates to meet any need you might have and change from one to the other as required.

Labels: , ,

Add to Technorati Favorites

Thursday, May 3, 2007

Gilding the Lily - Animating SmartArt


I love the new SmartArt feature in Office 2007 and I'd buy Office just to get hold of it. The images are drop dead gorgeous and they're so easy to make and to color.


So, what's better than great looking SmartArt? Animated SmartArt, that is. Launch PowerPoint 2007 and create a SmartArt object. Select it and then click the Animations tab. From the Animate dropdown list choose One by One and Preview the result - deliciously animated SmartArt. Of course, you can do all sorts of Animations - this is just to whet your appetite.


Fun huh?

Labels: , ,

Add to Technorati Favorites

Wednesday, May 2, 2007

Hide the Ribbon in Office 2007


Ok, I'm on record, I love the ribbon in Word but on my laptop with its scrunched up screen (in the tradeoff between size and weight, I opt for weight!) the ribbon is sometimes too big.

Not a worry, it's simplicity itself to hide it. Press Control + F1 and it disappears and press it again and it reappears. You can also have it disappear so it will come back with a single click on any tab name. To do this, double click a tab name and the ribbon disappears. Single click a tab name and it reappears - click again on the tab or in the document, and it disappears. Repeat until you're tired of the magic! Double click or Control + F1 to go back to how it is.

It's a neat party trick to play on a co-worker (no! I did not tell you to do that), and a great way to buy back some much needed screen real estate.

Labels: , ,

Add to Technorati Favorites

Tuesday, May 1, 2007

Hide or color Excel gridlines


Ok, grey is my favourite colour - it's the colour of my old school uniform. I'm an Aussie and we still wear uniforms to school! Mine was grey serge in winter and grey cotton in summer, complete with hats and gloves. I kid you not and this is seriously OT and it uses Australian spelling so I'll get back to what I was saying.


Ok, so gray might be my favorite color but it's probably not yours. If Excel's gray gridlines offend your color sense, you can change them or remove them entirely. To remove them choose Tool, Options, View tab and disable the Gridlines checkbox.


To change the color of the lines, choose Tool, Options, View tab and choose an alternate color from the Gridlines color dropdown list. If you didn't realise gridlines were little dots and not solid lines, you're about to see that that's exactly what they are.

Labels: ,

Add to Technorati Favorites