Articles | Photoshop blog | Photography blog | about me | e-mail

Helen Bradley - MS Office Tips, Tricks and Tutorials

I'm a lifestyle journalist and I've been writing about office productivity software for a long time. Here you'll find handy hints, tips, tricks, techniques and tutorials on using software as diverse as Excel, Word, PowerPoint, Outlook, Access and Publisher from Microsoft and other applications that I love. My publishing credits include PC Magazine, Windows XP mag, CNet, PC User mag, SmallbusinessComputing.com, Winplanet and Sydney Morning Herald.

Sunday, December 28, 2008

Don't Spell Check This..


Often when you’re working on a document including one which contains code, or foreign language words you will want the document spell checked but you’d like the code or foreign language words omitted – so you’re not distracted by the red underlining everywhere.

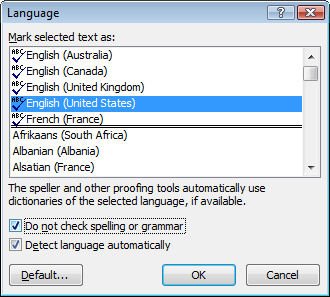
To do this, in Word 2007, select the text you don’t want to be checked and double click the Language entry on the status bar – typically this will show English (United States) or similar. When the dialog appears, choose the Do not check spelling or grammar checkbox. This disables spell checking for this particular word or selection. The rest of the document is spell checked as usual but words you don’t want to be checked, won’t be.

Labels: ,

Add to Technorati Favorites

Friday, December 19, 2008

Drawing Organic Shapes in Word


I needed something cute for a magazine sample the other day so I decided to create an organic shape. I needed three edges to be straight and one rounded.

Here's how it’s done, it makes use of nodes and Bezier curves, fairly simple to do when you know how.

Start with a new Word document. Display the Drawing toolbar and choose AutoShapes > Lines > Freeform. Start in one corner and click once to begin. Click at each point around the shape so you'll have a polygon shape. If you hold Shift as you click you'll make a straight line and, if desired, it will be perpendicular to the previous one too. It's important you get straight sides and square angles when you want your shape to butt up against a page edge.
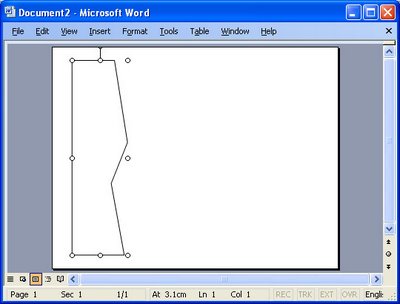


Click the shape to select it, right click and choose Edit Points. Control + Click on a point to delete it if you don't need it. Right click on a point that you want to be rounded and choose Smooth Point and then drag on the handles to shape it nicely.
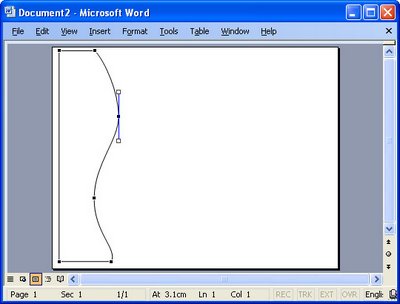


When you're done, click outside the shape to deselect it. click it again and right click, choose Format AutoShape. Choose Line Color > No Line and choose your Fill Color. Hold Control as you click and drag on the shape to duplicate it and set the Fill Color of this one a different color. Repeat if desired.

To arrange the shapes, click one to select it, right click and choose Order > Send to Back to send it below the others. Choose Order > Send Behind Text to send it below the text. The second command is used to move the shape to the bottom layer of the document below the text. Use the first command to change the layer order of the shapes so they are stacked as you want them to be.

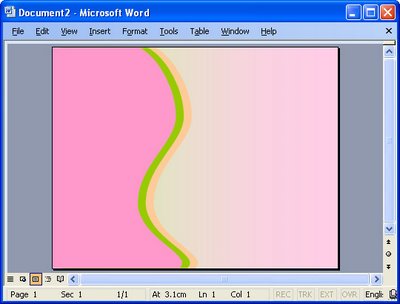
When you're done you should have a page that looks something like this, I sized the shape to fill the page and moved it to the edge of the page. I also added a gradient filled rectangle under everything just to finish it all off.

Labels: , , , ,

Add to Technorati Favorites

Wednesday, December 17, 2008

Fix the Headings in your Excel 2007 tables


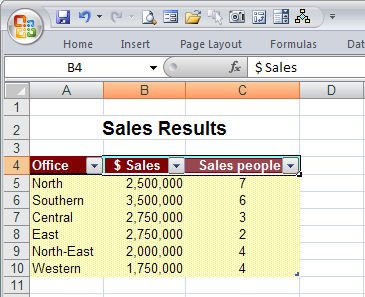
Excel 2007 has some great tools for working with and formatting tables (previously called Lists in earlier versions). To create a table, select the range that contains the table data and from the Home tab select Format As Table. Select a table format style and, when prompted to, confirm that the selected area contains all the data for your table, whether or not your table has headers and click Ok. When you do this you will see that each heading cell displays a dropdown arrow to the right of its contents.

Unfortunately, if your headers are right aligned, the table headings will run into the arrows and be partially hidden. I don't know why Microsoft doesn't create a fix for this because it looks awful. To avoid this happening, select the heading cells, right click and choose Format Cells. Click the Custom setting and type @ and four spaces and click Ok. This should add sufficient spaces to the right of a heading to move the headings a little to the left so the headings can be seen clearly. Now it all looks much nicer as you see above.

Labels: , , , ,

Add to Technorati Favorites

Wednesday, December 3, 2008

Yes Master...


I love it when folks call me or email to pose questions. It's hard when you work with apps every day to remember there are folk out there for whom Word and Excel are a daily challenge and not necessarily in a good way.

Today's came from my partner, a PowerPoint file with a serious case of bloat. Now, if it were a cow, you'd do something rather disgusting with a knife between the ribs - no it doesn't kill them, it cures them - lets all the nasty gasses out. In PowerPoint, the solutions are different. One cause in this file was the lack of use of a Slide Master. You see the person (not my partner, she's better at PP than that) put a wonderful but very large image on all the slides - each one had its own version of the image - instant bloat.

The solution, next time would be to build the file properly and put that image on the background layer of the Slide Master - when you do this it automatically gets added to all slides - if you have 100 slides you still have only one image - instant slimming for your file.

If you need a plain slide - no image, you create two masters - one with an image and one without - use the master you need for the slide you're creating. Pretty easy stuff and makes a presentation much easier to email - that was the problem here - at 7Mb it was too big for most folk's email inbox so it bounced right back and something that big doesn't bounce so much as go splat!

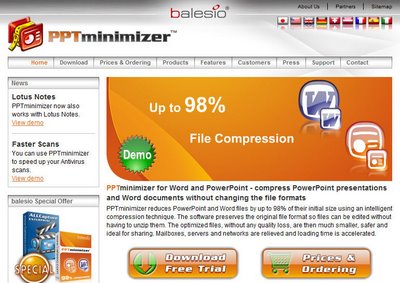
The solution I used on this file was different. I didn't want to go rebuild someone else's file at no charge - so I grabbed a great app called PowerPoint Minimizer - it shrinks PP files really really small so folks like me can look good by solving a problem that everyone else has spent hours on in a matter of minutes.

Find PowerPoint Minimizer here for download. Best thing is you can trial it and see how it works.

Labels: , ,

Add to Technorati Favorites