Articles | Photoshop blog | Photography blog | about me | e-mail

Helen Bradley - MS Office Tips, Tricks and Tutorials

I'm a lifestyle journalist and I've been writing about office productivity software for a long time. Here you'll find handy hints, tips, tricks, techniques and tutorials on using software as diverse as Excel, Word, PowerPoint, Outlook, Access and Publisher from Microsoft and other applications that I love. My publishing credits include PC Magazine, Windows XP mag, CNet, PC User mag, SmallbusinessComputing.com, Winplanet and Sydney Morning Herald.

Thursday, January 21, 2010

Word 2007: Drawing in documents
One technique that has changed with Word 2007 is drawing in documents.

Instead of having a Drawing toolbar you now select shapes from the Shapes dropdown list on the Insert tab.

From this list you can select shapes such as lines and all the AutoShapes that you are used to using in earlier versions.

To create a drawing, for example, you can select and insert the shapes that make up the drawing and then format them using the Drawing Tools > Format options on the Ribbon.

Many of the color options that are available are connected to the theme colors so, provided you use a theme color in your drawn shapes, the colors will change automatically later if a different theme is applied to the document so the drawing stays consistent with the remainder of the document.

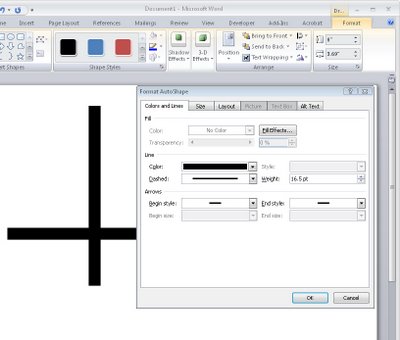
Find the shape formatting tools on the Drawing Tools > Format tab on the Ribbon.

What is missing in Word 2007 is the ability to right click a shape and have the format AutoShape dialog appear as it does in Excel and PowerPoint.

The Format tab and the Format Object dialog in Word offer less features than are available in the new graphics engine in the other applications.

Labels: , , , , ,

Add to Technorati Favorites

Friday, December 19, 2008

Drawing Organic Shapes in Word


I needed something cute for a magazine sample the other day so I decided to create an organic shape. I needed three edges to be straight and one rounded.

Here's how it’s done, it makes use of nodes and Bezier curves, fairly simple to do when you know how.

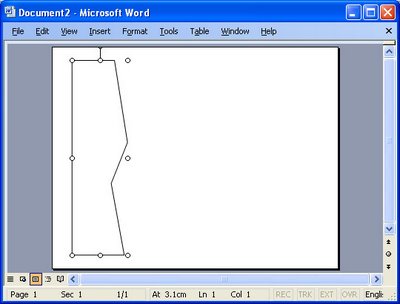
Start with a new Word document. Display the Drawing toolbar and choose AutoShapes > Lines > Freeform. Start in one corner and click once to begin. Click at each point around the shape so you'll have a polygon shape. If you hold Shift as you click you'll make a straight line and, if desired, it will be perpendicular to the previous one too. It's important you get straight sides and square angles when you want your shape to butt up against a page edge.


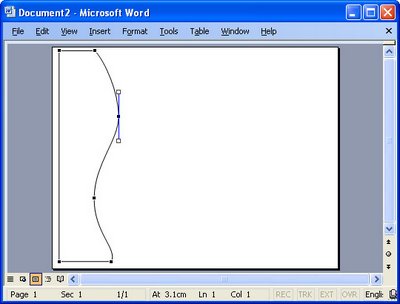
Click the shape to select it, right click and choose Edit Points. Control + Click on a point to delete it if you don't need it. Right click on a point that you want to be rounded and choose Smooth Point and then drag on the handles to shape it nicely.


When you're done, click outside the shape to deselect it. click it again and right click, choose Format AutoShape. Choose Line Color > No Line and choose your Fill Color. Hold Control as you click and drag on the shape to duplicate it and set the Fill Color of this one a different color. Repeat if desired.

To arrange the shapes, click one to select it, right click and choose Order > Send to Back to send it below the others. Choose Order > Send Behind Text to send it below the text. The second command is used to move the shape to the bottom layer of the document below the text. Use the first command to change the layer order of the shapes so they are stacked as you want them to be.

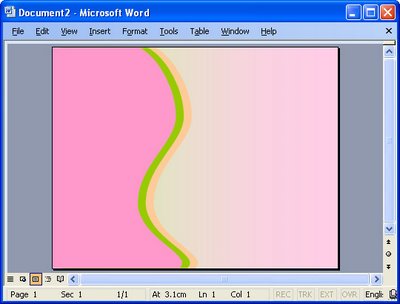
When you're done you should have a page that looks something like this, I sized the shape to fill the page and moved it to the edge of the page. I also added a gradient filled rectangle under everything just to finish it all off.

Labels: , , , ,

Add to Technorati Favorites

Thursday, August 9, 2007

Shapes are different in Word 2007


I've been working with shapes a lot in Office 2007 cause I've just written a huge article about them. It didn't start out to be huge but that's the way it ended up. You see there's just so much to learn about them and it's not all intuitive. The problem as I see it is that part of Office 2007 was just cobbled together (love that word cobbled!). Things aren't consistent, far from it. One of the most interesting inconsistencies is how Shapes are implemented in Word and in Excel and PowerPoint.

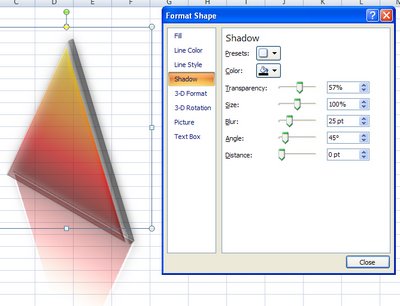
In Excel and PowerPoint shapes work the same pretty much and, if you add a shape and right click it you can choose Format Shape and you get this snazzy new dialog to work with. Do the same in Word and life is very different indeed - there's no new dialog just the old stuff.

What this means in practical terms is that you can't fill a Word shape with an image from the clipboard or a clip art image - you can in Excel and PowerPoint and you can't create your own custom multicolor gradient for a Word shape. The issue is that there's a new graphics engine in Office 2007 called Escher graphics (presumably named after one of my favourite artists, MC Escher) which is implemented fully in Excel and PowerPoint but only partially in Word. So, don't expect Shapes in Word to behave the same as they do in PowerPoint or Excel, cause they won't - it's that simple.

Labels: , , ,

Add to Technorati Favorites

Monday, May 7, 2007

Circular images in Word


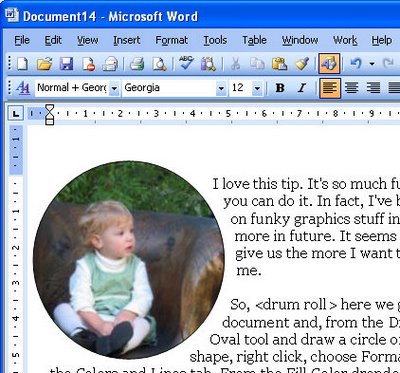
I love this tip. It's so much fun and so unexpected that you can do it. In fact, I've been working a lot lately on funky graphics stuff in Word so expect to see more in future. It seems like the fewer tools they give us the more I want to make them work for me.

So, here we go. Open a Word document and, from the Drawing toolbar, click the Oval tool and draw a circle on the page. Click the shape, right click, choose Format AutoShape and click the Colors and Lines tab. From the Fill Color dropdown list choose Fill Effects then the Picture tab. Then click Select Picture and locate and open your image by clicking Insert. Click the Lock picture aspect ratio checkbox and click Ok twice. It sounds complicated but it’s really pretty easy to do and the results.. well they’re great.

Better still, you can use any shape – it doesn’t have to be a circle… any of the AutoShapes will do.

Labels: , ,

Add to Technorati Favorites

Saturday, March 17, 2007

Any shape Excel Comments


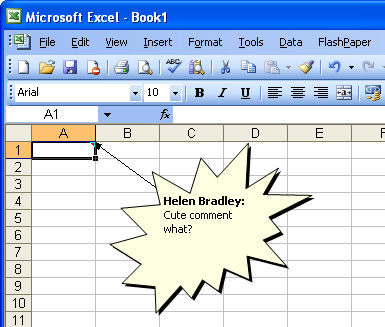
I like to use comments in my Excel worksheets but sometimes the square yellow boxes just don’t do it for me.

Luckily with a little bit of imagination and skill, I can change the shape of my comment boxes.

Here's how to do it yourself:

Add a comment to your worksheet and click the cell that contains the comment, right-click and choose Edit Comment and then click on the border of the comment so you have it selected.

Now, from the Drawing toolbar click the Draw button and choose the Change AutoShape option in the menu. You can select from all sorts of shapes including stars and banners and flowchart symbols.

When you’re done just click outside the comment and the change will be created for you. Neat stuff? I think so.

Labels: , ,

Add to Technorati Favorites

Wednesday, February 28, 2007

Set the style of Publisher objects

When you repeatedly use a Publisher shape or text box and when you always need to make changes to its format to meet your needs, set the shape so it always looks how you want it to look.

To do this, insert the shape or the text box for which you want to configure the defaults and right click it and choose Format AutoShape or Format Text Box as desired and make your changes. Switch to the Colors and Lines tab and enable the "Apply settings to new AutoShapes" (or "Apply settings to new Text Boxes) checkbox and click Ok. New objects of this type will now take on the selected formatting options.

Labels: , ,

Add to Technorati Favorites

Friday, February 16, 2007

Shameless Self Promotion

Ok, so it's not exactly a tip of the day, but I already did today's so I feel it's justified.

I have lots of cool Photoshop tutorials around my site, check these out:

Photoshop Brushes tutorial
Learn how to create your own Photoshop Brushes

How to use Adjustment Layers
Make photoediting a simple and undoable process using Adjustment layers

Photoshop Gradients
Fix images and create colorful effects using Photoshop Gradients

Straighten an image in Photoshop, Elements and Paintshop Pro
Straighten your images with this simple to follow tutorial that covers the popular photoediting programs

Photoshop Shapes -New!
Helen Bradley explains how to use Photoshop Shapes to edit your photos and create fun shape overlays.

Create and use Photoshop Masks
Masks aren't as hard as you think they are and this tutorial makes them simple to use.

Create seamless patterns in Photoshop
Whether you need them for the web or for a background for an Excel worksheet, here's how to create great seamless patterns and we've included a mini tutorial on TV scan lines.

Color match photos in Photoshop
Even if your photos were taken in totally different lighting

Color Swatches in Photoshop
Create your own custom color swatches and use them in your photo editing work.

Ok, so that's done, now back to the tips..

Labels: , , , , , , , , , , , ,

Add to Technorati Favorites