|
|
|
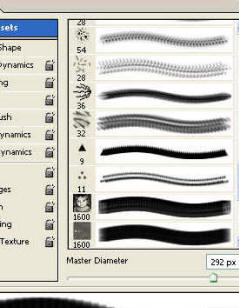
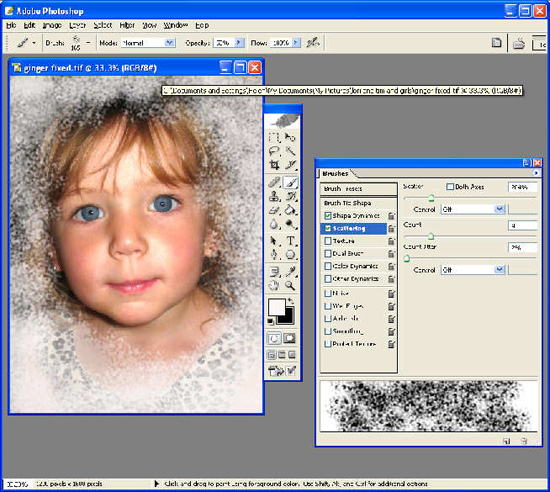
Photoshop - make your own BrushesHelen Bradley Just as a painter will have a range of brushes for all sorts of needs, so too the digital painter needs a range of brushes.When you're painting a picture, you pick a brush made from the right material and the appropriate size and shape for the task in hand. There are literally hundreds of different types of paint brushes and that's without delving into texture tools like sponges and towels. The digital artist and photographer can also make use of brushes for all sorts of effects. In fact, complex collage style images can be created in minutes using a selection of brushes and layer blend modes. Here I'll show you how to locate and install brushes into Photoshop and how to use them for a range of photo effects. You'll also see how to make your own custom brushes to use in any Photoshop image. What is a brush?Brushes in Photoshop and other graphics programs are used to determine the shape of the line you paint with when you use the paint brush tool. They also determine the shape of the eraser when you erase around an image or through it. You will already have had experience with choosing different shape brushes - circles and ovals etc. However there are many specialist brush shapes available that you can also use. One typical use for these brushes is to create patterns in your image, for example, they're a great tool for blending two images into each other as you might do if you are creating a collage. You can also create art using brushes and, if you have a good selection of brushes, you may not even want to use photos and you can still create some wonderful images using just the brushes, colours, blends and filters. Brushes also overcome the "I can't draw as well as I'd like to" problem as they can contain drawn objects that do the drawing work for you. There are literally thousands upon thousands of brushes available on the web - some are free, others you will buy. A quick search for "Photoshop brushes" in Google will show you that there's an entire world of brush possibilities out there. Brushes are greyscale images so, when you paint with them they take on the colour of the paint that you've chosen. It isn't possible to have brushes appear in colour. However, since brushes can be greyscale and don't have to be purely black and white they will show gradations in colour when you paint with them. So, if you paint with a greyscale brush in a turquoise colour you'll get colour ranging from full saturation to partial saturation depending on the greys/blacks and whites in the brush. To find brushes in Photoshop, choose a tool that uses brushes, such as the Brush tool and from the Tool options palette display the available brushes. You can choose any of these and size it to the size you want to use it at. However, that's not all you can do and if you choose Window, Brushes you will see there are a range of other options you can use with the built in brushes. For example, select a brush and then set the Scattering options for it so that, instead of forming a straight line when you paint with it, the brush shapes are scattered in all directions. Then, when you paint with the brush it will form a more interesting surface texture on the image - this not only makes the result less harsh but it saves you time in having to move the brush to create the complex result yourself. You can apply textures to brushes to make them look distressed and, if you use a graphic tablet, you can set specific characteristics that respond to pen sensitivity for much better control.
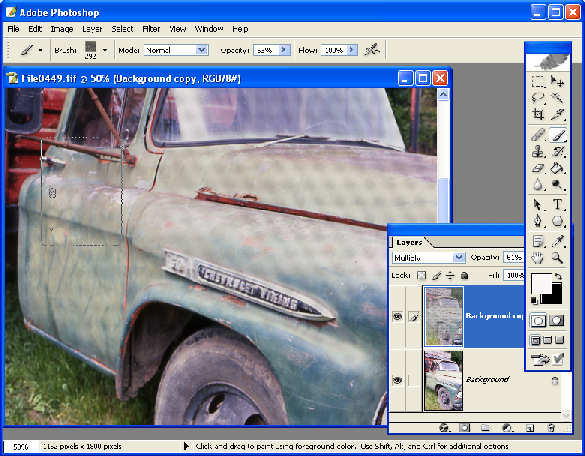
Using the brush preset options you can configure what appear to be simple brushes to perform more complex effects.
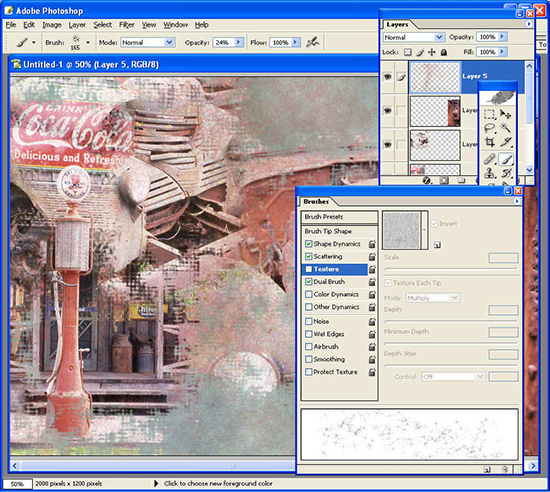
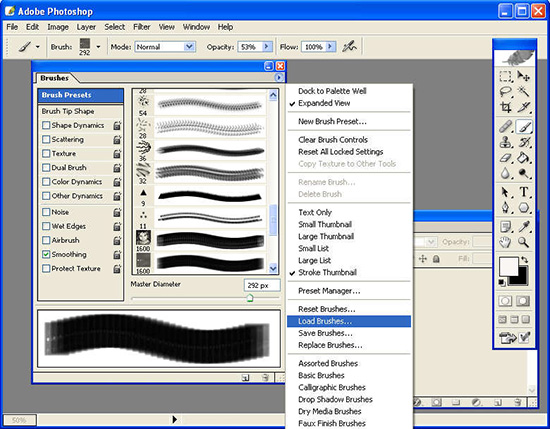
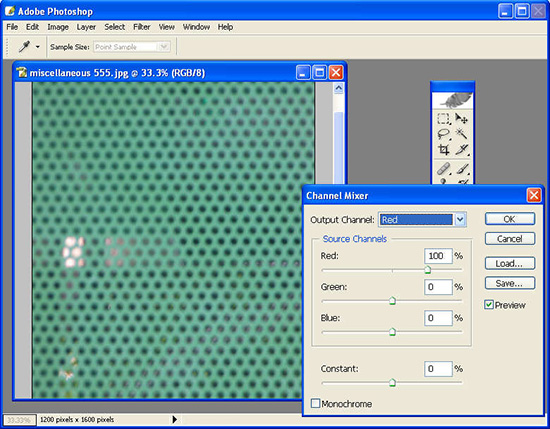
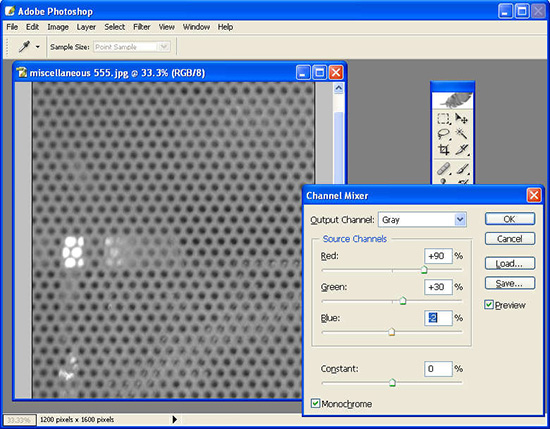
Using a combination of erasing and painting with brushes you can create very complex collages images in a very short time. Quick and easy collagesTo create a photo collage in Photoshop first create a single coloured background using the fill tool and apply the difference clouds filter to it and then colorize it using the Hue/Saturation tool. When you start with a filled textured background you'll find it easier to create the photo collage. Now drag and drop photos into the document and size them and arrange them as you want them to appear - where they overlap you can soften and blend them together. Now choose a brush and the eraser tool and start erasing the hard edges of the photos so that either the background or another image appears underneath. Continue to erase using various brushes and configure various settings for the brushes such as the scatter, texture and size of them. You can not only erase parts of your photos but you can also apply colour to the image using these same brushes. Use colours sampled from the image or that complement or contrast with it and you can build very complex layered images very quickly. Brushes made from interesting size and shaped pieces of text also look good as part of a collage. Remember that, in most cases, you're not wanting to see recognisable words but just the suggestion of them - their shapes and outlines. Ideas for brushesThe step by step example shows how to create your own brushes in Photoshop. You can create these for a range of purposes and from a range of different images. For example, you can create a brush from your company logo or you can create brushes from images of people. You can also convert text to a brush or scan an image or a piece of text and use that. You can also make brushes from any image or portion of an image whether recognisable as an object or not. Making a brush in PhotoshopHere's how to install and find downloaded brushes in Photoshop and how to create your own brush. Step1Locate a site with brushes and select the brush to download ensuring you choose Photoshop style brushes because Photoshop cannot use other program's brushes. Unzip the file containing the brushes. Step 2Launch Photoshop and choose Window, Brushes and click the menu and choose Load Brushes. Browse to where the brushes were unzipped and you can click those to load into the brushes palette. Step 3To create your own brush, first open an image to use as the basis of the brush. Here we've used a photo of a piece of metal mesh from the side of a bus stop. Convert the image to monochrome using the Image, Adjustments, Channel Mixer dialog. Step 4Click Monochrome and adjust the sliders until you have a good range of colours from black through grey to white in the image. Click Ok to finish and then select the area to convert to a brush using your preferred selection tool - you can select the entire image if desired.
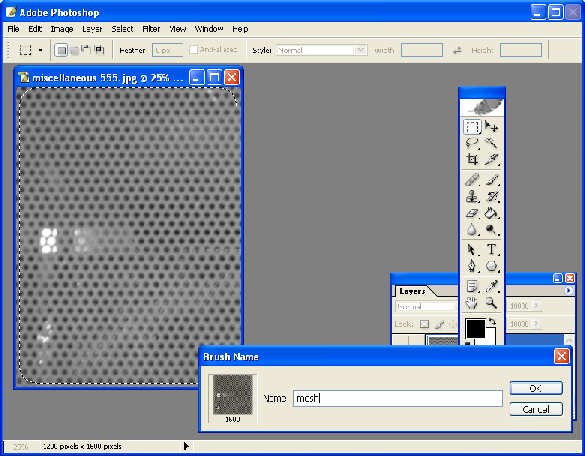
Step 5Choose Edit, Define Brush Preset and type a name for your brush and click Ok. You can now discard the image if desired. To use the brush, open an image to use it with and choose the Brush or the Eraser tool - these both use the brush shapes. Step 6You can select your brush from your list of brushes (it will be at the bottom of the list), and adjust its size to suit the need. Select a colour to use, if you're painting and then you can paint on the image with your brush in the same way you would any of the regular Photoshop brushes.
|
|
|
(c) 2019, Helen Bradley, All Rights Reserved. |