Articles | Photoshop blog | Photography blog | about me | e-mail

Helen Bradley - MS Office Tips, Tricks and Tutorials

I'm a lifestyle journalist and I've been writing about office productivity software for a long time. Here you'll find handy hints, tips, tricks, techniques and tutorials on using software as diverse as Excel, Word, PowerPoint, Outlook, Access and Publisher from Microsoft and other applications that I love. My publishing credits include PC Magazine, Windows XP mag, CNet, PC User mag, SmallbusinessComputing.com, Winplanet and Sydney Morning Herald.

Wednesday, December 3, 2008

Yes Master...


I love it when folks call me or email to pose questions. It's hard when you work with apps every day to remember there are folk out there for whom Word and Excel are a daily challenge and not necessarily in a good way.

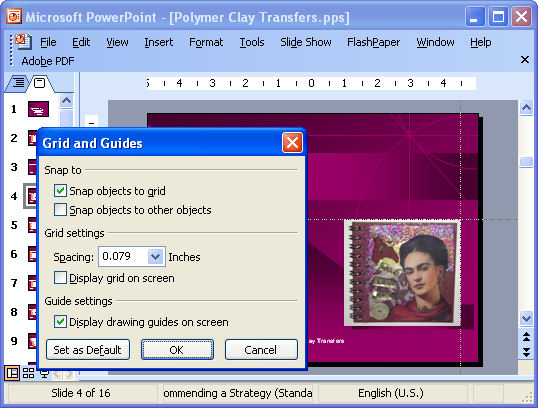
Today's came from my partner, a PowerPoint file with a serious case of bloat. Now, if it were a cow, you'd do something rather disgusting with a knife between the ribs - no it doesn't kill them, it cures them - lets all the nasty gasses out. In PowerPoint, the solutions are different. One cause in this file was the lack of use of a Slide Master. You see the person (not my partner, she's better at PP than that) put a wonderful but very large image on all the slides - each one had its own version of the image - instant bloat.

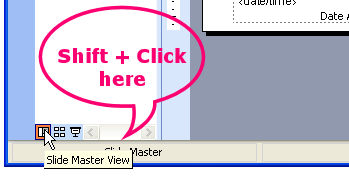
The solution, next time would be to build the file properly and put that image on the background layer of the Slide Master - when you do this it automatically gets added to all slides - if you have 100 slides you still have only one image - instant slimming for your file.

If you need a plain slide - no image, you create two masters - one with an image and one without - use the master you need for the slide you're creating. Pretty easy stuff and makes a presentation much easier to email - that was the problem here - at 7Mb it was too big for most folk's email inbox so it bounced right back and something that big doesn't bounce so much as go splat!

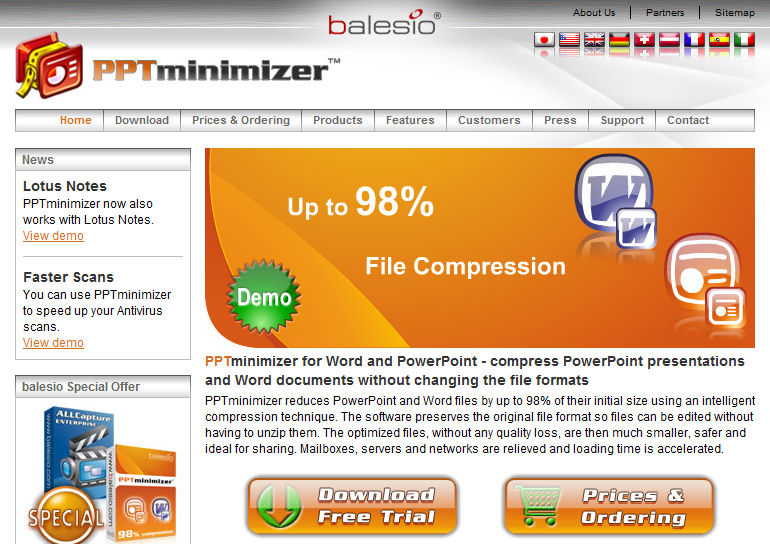
The solution I used on this file was different. I didn't want to go rebuild someone else's file at no charge - so I grabbed a great app called PowerPoint Minimizer - it shrinks PP files really really small so folks like me can look good by solving a problem that everyone else has spent hours on in a matter of minutes.

Find PowerPoint Minimizer here for download. Best thing is you can trial it and see how it works.

Labels: , ,

Add to Technorati Favorites

Thursday, March 20, 2008

What's in a name? Auto_Open or AutoOpen

Sometimes you wonder if the folks up at Redmond are laughing at us behind our backs. Really, do they deliberately set out to confuse us or are they just that plain disorganised?

Today my quandary involves Auto_Open and AutoOpen. These are two special macro names. The first, Auto_Open is Excel's special named macro that runs automatically when the workbook containing it is opened. AutoOpen is the Word equivalent. It makes no sense that one has an underscore and the other doesn't - it just makes life for us VBA folk a little more confusing than it should be.

The other macros Auto_Close and AutoClose work the same way, Auto_Close is the Excel macro name - call a macro by this name and save it in your workbook and it will run whenever you close the workbook. In Word, the name is AutoClose.

To add to the confusion, PowerPoint doesn't support either of the naming conventions, in fact, you can't create auto running macros in PowerPoint the same way you do in Word and Excel. The workaround is cumbersome, you need to create a PowerPoint add-in that includes the Auto_Open subroutine. Load the Add-in and PowerPoint will run the code in Auto_Open it loads and ditto for subroutine called Auto_close - it runs when the add-in is unloaded - which happens automatically when you exit PowerPoint. Learn more about how to do this in this KnowledgeBase article.

Thanks Redmond, we are now officially confused!

Labels: , , , , , , ,

Add to Technorati Favorites

Tuesday, March 11, 2008

PowerPoint to Go - on your mobile or iPod

You can put a PowerPoint presentation on almost any mobile device including your iPod.

Provided your mobile device supports JPEG format images - most will - open your presentation in PowerPoint and choose File, Save As and select the JPEG format, choose All Slides and PowerPoint will save the slides as JPEG format files that you can now upload to your mobile device as you do any other photos.

If your mobile lets you play images as a slideshow - voila! PowerPoint to go!

Labels: , , , ,

Add to Technorati Favorites

Friday, March 7, 2008

No new line in PowerPoint

When you are entering text on a PowerPoint slide if you want to create a new line but not apply a bullet to it press Shift + Enter at the end of the preceding line.

This creates a new line but does not start a new paragraph which is the trigger for the bullet to be created.

This also works in Word - you can create a new line in a numbered paragraph but without adding a new number by pressing Shift + Enter.

Labels: ,

Add to Technorati Favorites

Monday, April 30, 2007

PowerPoint - to fit or not - it's your choice


PowerPoint has a handy tool (or a very annoying one - depending on your perspective) for adjusting text on a slide.


In PowerPoint 2003 and earlier choose Tools > AutoCorrect Options > Autoformat as you Type and you will see that there is an option called Autofit body text to placeholder. Enabled this and all the text that you type on a slide is automatically sized to fit the slide - you can type gobs of text and it just keeps getting made smaller and smaller as PowerPoint shoehorns it in so it fits.


If you disable this option, you get to control the slide's text size yourself - a rough rule of thumb is that if it goes over the edge - it's too much text for one slide so make another one or edit your text.


Autofit is a tool you can disable or enable as you like - once you know it's there - it’s your choice what you do with it.

Labels: , ,

Add to Technorati Favorites

Thursday, April 26, 2007

PowerPoint Master shortcut


If you’re like me and you use the PowerPoint master view a lot—and you really should because it allows you to control the formatting of all the slides in your presentation from one place—you will know that there’s no quick way to open into master view.

That is unless you read this tip.


To quickly access the slide master view hold Shift and click the Slide View button in the bottom left corner of the PowerPoint screen. This automatically opens master view allowing you to work on the slide master then close it and return to your PowerPoint presentation. Simple, when you know how?

Labels: ,

Add to Technorati Favorites

Thursday, March 29, 2007

Getting alignment right (or left), in PowerPoint


Let's face it, it's easy to dump pictures, text and charts on a PowerPoint slide but it can end up looking like the dog's breakfast - at least what I imagine a dog might eat for breakfast.

When you want your slide to look good, you need to have everything aligned neatly on it. To do this, click on the first object to align and Control + click on the second. From the Drawing toolbar choose Draw, Align or Distribute and then an option such as Align left to align both objects so they're lined up along the left edge of the object that is further to the left on the screen.

In a few simple clicks you can restore order to an unruly slide.

Labels: ,

Add to Technorati Favorites

Wednesday, March 14, 2007

PowerPoint Guides


If you're a perfectionist like I am (on a good day, anyway), you will want everthing lined up neatly on your PowerPoint slides. To do this, use Drawing Guides. To do this, choose View, Grid and Guides and enable the Display Drawing Guides on Screen checkbox.

You'll see two cross hatch grid lines. To move them simply hold your mouse over them and move one. To create a new guide, hold the Control key as you drag on an existing guide. To remove a guide drag it off the slide.

You can now neatly line everything up that needs to be lined up.

Labels: ,

Add to Technorati Favorites

Tuesday, March 13, 2007

Smaller spaces on PowerPoint Slides

Sometimes there is just too much space between the edge of the slide and the bullet character that PowerPoint uses.

However, luckily, there is a way to fix the problem and to make the space smaller. Start by displaying the ruler by choosign View, Ruler. Then select the text to alter and, on the ruler you'll see the marker that controls the positioning of the bullet. Drag it with your mouse, if you need to do this in small amounts, hold Control as you do it.

Which is a bit strange really, because in Word, for example, holding Alt is how you get to fine tune spacing.. hmm! well, if nothing else, these crazy mixed up keystrokes keep some of us in business.

Labels: ,

Add to Technorati Favorites

Friday, March 9, 2007

PowerPoint preview and edit

I'm one of those people who love to do multiple things at one time. I can listen to a movie, work and have the washer and dryer chugging away in the background while I'm planning a weekend art project.

That's why I love today's tip. It lets you preview a PowerPoint presentation at the same time as you edit it.

Simply, choose Slide Show and while clicking View Show, hold the Control key. You'll see your slide show on the screen in the top left corner and PowerPoint visible in the remaining area. You can work on the show and preview it (and your changes) the same time.. neat idea?

Labels: ,

Add to Technorati Favorites

Saturday, March 3, 2007

Use the PowerPoint menu to go back

By default, when you are viewing a PowerPoint presentation pressing the right mouse button shows the PowerPoint presentation menu.

If you'd prefer that, instead, it moved back one slide, then you can configure it to do this. Choose Tools, Options and click the View tab. Clear the Show menu on right mouse click checkbox and click Ok.

Now, the left mouse takes you forward and the right takes you back. If you need to see the menu at any time, pressing Shift + F10 will display it.

Labels: , ,

Add to Technorati Favorites

Wednesday, February 21, 2007

Getting into PowerPoint Actions

When you create PowerPoint presentations that will be used or viewed by one person at a time, rather than by a group, you can customise movement using Action buttons.

Using an action button you can take a user to another place in the presentation or offer Yes and No as a choice to progress to the next slide and take the user to different places depending on their answer.

To add an action button, click on the slide to contain the action and chose Slide Show, Action Buttons and choose Action Button: Information and drag to place the button on the slide. When the Action Settings dialog appears, choose Hyperlink to and select the slide to link to. When a user clicks the button they will be taken to that slide.

If you want them to be able to return to where they came from you can add an Action: Return button to the slide you're sending them to and they can click it to return to where they came from. This is handy for providing a slide with more information on the topic, for example.

You can use Actions without the buttons that PowerPoint provides. So, for example, you can use custom icons or AutoShapes and place them on the slide. Then right click the image and choose Action Settings from the menu. From here you can configure the same action options for the shape as you do for a PowerPoint Action button.

Action buttons can also be used to display an Excel worksheet or chart, a Word document, or even a web page, for example. When you're creating an action button that should appear on all the slides in a presentation, you should create it on the Slide master by choosing View, Masters, Slide Master. Then the action button will be accessible to all slides in the presentation. If you need to block it from one slide, place an object over the top of it – action buttons under other objects are disabled and cannot be clicked.

Labels: , , ,

Add to Technorati Favorites