Articles | Photoshop blog | Photography blog | about me | e-mail

Helen Bradley - MS Office Tips, Tricks and Tutorials

I'm a lifestyle journalist and I've been writing about office productivity software for a long time. Here you'll find handy hints, tips, tricks, techniques and tutorials on using software as diverse as Excel, Word, PowerPoint, Outlook, Access and Publisher from Microsoft and other applications that I love. My publishing credits include PC Magazine, Windows XP mag, CNet, PC User mag, SmallbusinessComputing.com, Winplanet and Sydney Morning Herald.

Friday, June 12, 2009

Formatting pictures in Word 2007


The picture formatting tools in Word 2007 are far more sophisticated than those in earlier versions of Word.

To see them at work, insert a picture into your document, click the image and choose Picture Tools > Format on the Ribbon. The Picture Styles are formats you can apply to your image and they include some attractive looking options including wide and narrow black or white borders and rotated options.

Once you have selected a picture style to use you can adjust other characteristics of the format such as the Effects which it are applied to it. So, for example, you can create a reflection by selecting the picture and choose the Picture Effects > Reflection to add a reflected edge.

You can recolor the picture border using the Picture Border option.

If you have formatted a picture to look the way you want it to look and you change your mind about the image to use, don't panic. Choose Picture Tools > Format > Change Picture and choose an alternate image leaving your formatting unchanged.

Labels: , ,

Add to Technorati Favorites

Wednesday, May 6, 2009

What cell is that? Identifying table cells in Word

When you're working with Word and doing math in your tables, you need to know the name of each table cell. In a largish table it can be difficult to keep track of everything.

Back in the days of Word 97 a macro shipped with Word that would tell you the name or cell reference of a given table cell. Here's how to take a step back in time and get that macro, install and use it, with later versions of Word:


Visit 
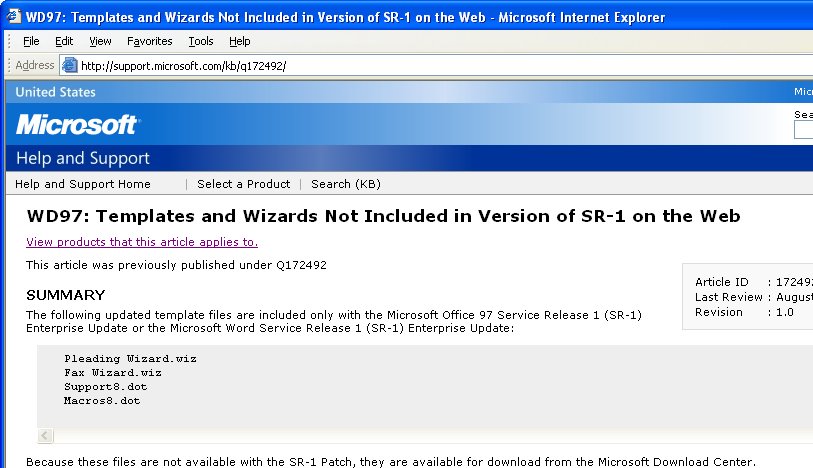
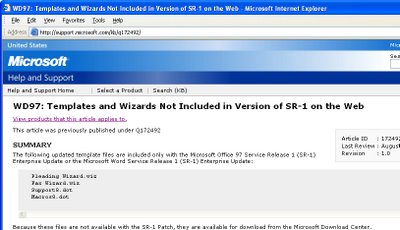
http://support.microsoft.com/kb/q172492/ and download the file Wdtlupd.exe which is referred to on this page. This is a self-extracting zip file which includes various documents, the one we're using is not version specific. Run this file and select a location to save the extracted files into.


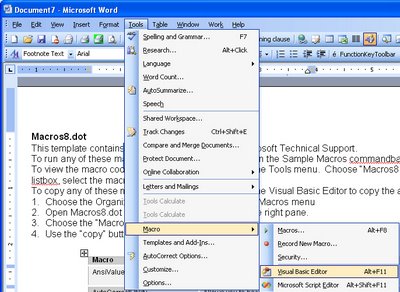
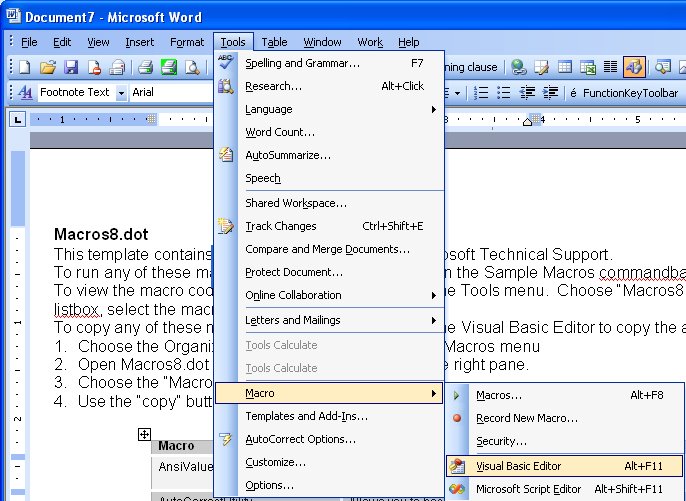
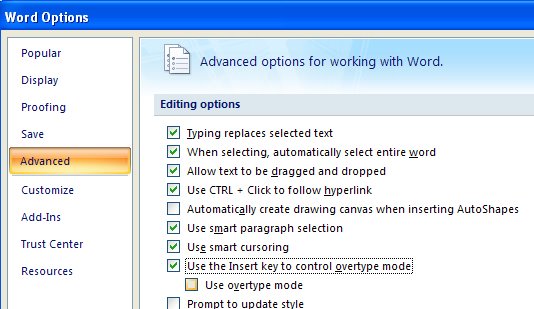
Open the folder containing the extracted files and double click the file macros8.dot to open it in your version of Word. If prompted to do so, click the Enable Macros button and the file will open automatically in Word. Now choose Tools, Macros, Visual Basic Editor if you are using Word 2003 or earlier. In Word 2007, make sure the Developer tab is visible (Office button > Word Options > Popular > Show Developer tab in the Ribbon). Choose Developer tab > Visual Basic.


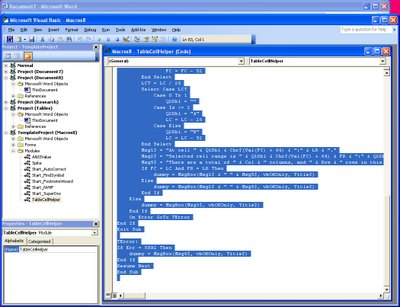
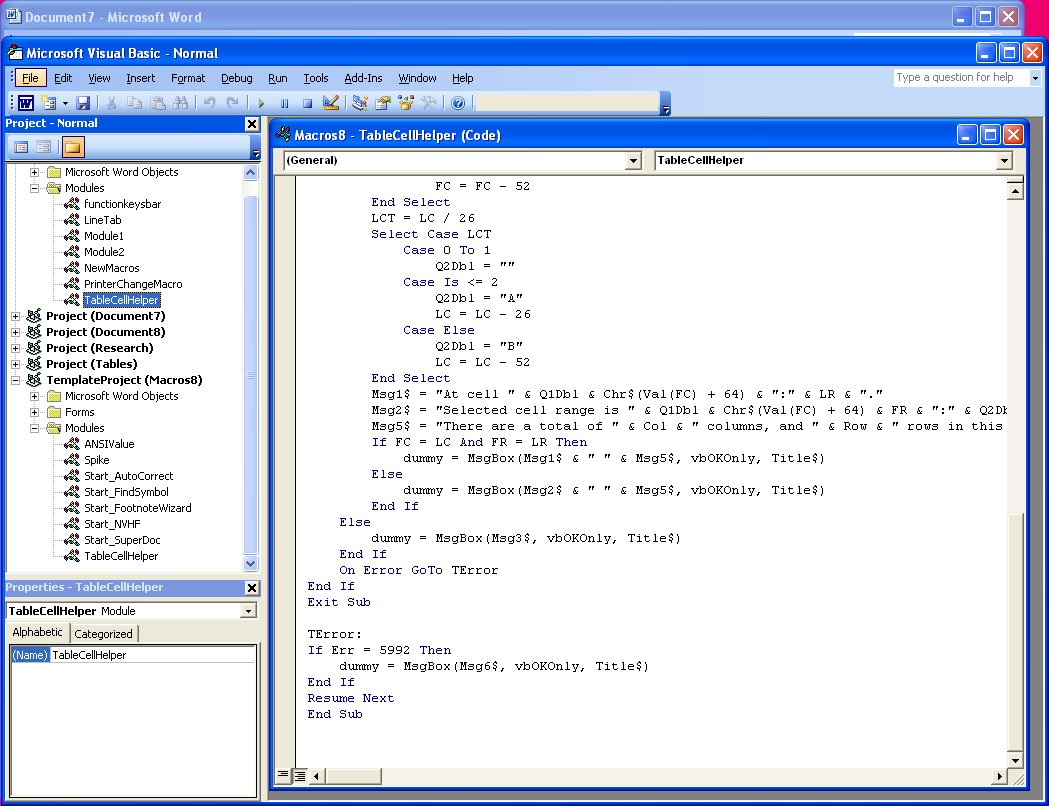
Locate the Macros8.dot file in the Project list on the left of the screen and click to open its Modules collection. Locate the module called TableCellHelper and double click it open the code window. Select the code and copy it by choosing Edit, Copy.


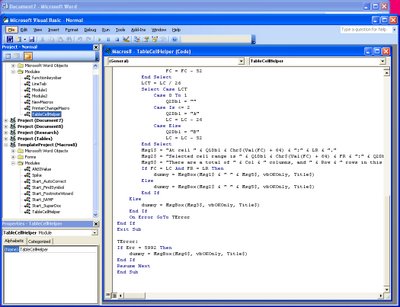
Locate the file Normal in the Project collection and click its Modules collection. Choose Insert, Module to add a new module, double click to open this new module and choose Edit, Paste to paste the copied code into the module. In the Properties area (choose View, Properties Window to display this if needed), alter the module name to TableCellHelper and, when you're done, close the Visual Basic editor and close the file created using Macros8.dot.


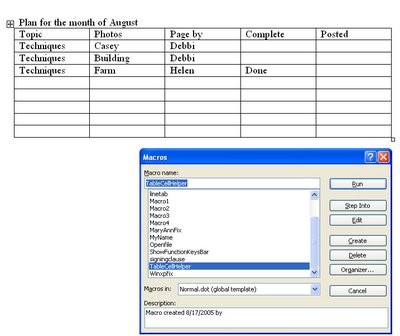
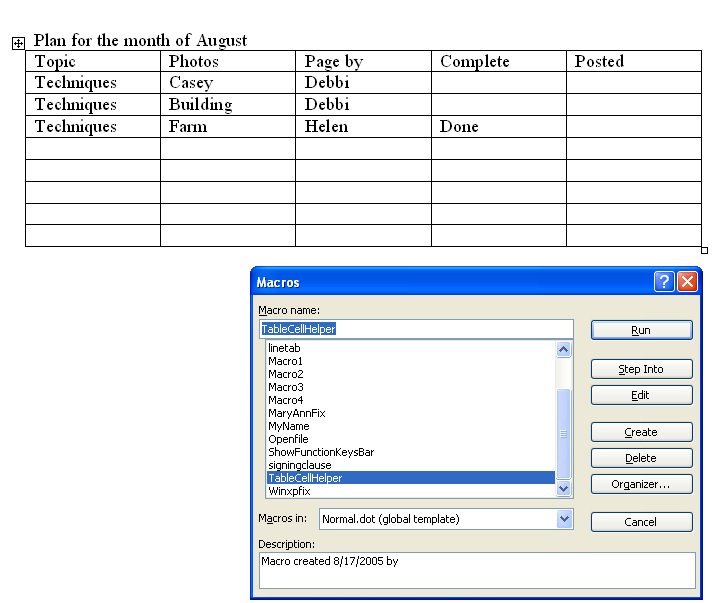
In Word 2003 and earlier, run the macro by clicking somewhere inside a table and choose Tools > Macro > Macros from the Macros in list choose Normal.dot and locate and run the macro called TableCellHelper. In Word 2007 click the Developer tab > Macros and from the Macros in list choose Normal.dotm and locate and run the macro called TableCellHelper. The macro will report the cell address and the total number of rows and columns in the table.


If you'd use this macro repeatedly, add it as a button to your Word 2003 (and earlier), toolbar by right clicking a toolbar and choose Customize. Click the Commands tab, select Macros from the Categories list and locate and drag the macro TableCellHelper on to the toolbar. Right click the new button and edit the name so it is shorter and more helpful. Close the Customize dialog.

Labels: , , , , , , ,

Add to Technorati Favorites

Friday, October 19, 2007

Word 2007 - Tracking Moving changes

The new Office 2007 is packed full of great features and I'm finding that the more I work with it the more I like it.

Take Tracked Changes, for example. The Reviewing pane can now be placed vertically along the edge of the page (or horizontally, if you insist). I just find the vertical arrangement so much easier to work with.

Also Word now tracks moved text! Yes, you can grab a sentence or paragraph or more and move it from A to B in your document and Word knows you've done it and marks it with double strikethrough (where it has been removed from) and double underlining in the position it has been moved to. Neat stuff!

If you later Reject the move step Word checks to see if the moved text has been altered, and if it has it tells you this and asks you what version of the text you want to undo to. It's smart and a much better solution than marking the text as being cut and inserted.

To use the feature, make sure you're in Word 2007 mode and not Compatibility mode where you're working on an older 2003 format document.

Labels: , , ,

Add to Technorati Favorites

Thursday, August 30, 2007

Word 2007 - where'd typeover go?


Typeover mode got axed in Word 2007 - thousands upon thousands of users are celebrating the event - no more gobbled up words when you hit the Insert key by mistake. Some users, however, are crying into their morning coffee - if you used it and understood it, typeover mode was great - the keyword being "was".

So, if you're bemoaning the loss of Typeover, be glad you stopped by to sample today's tip. Here's the way to put typeover back where you wanted it to be. Click the Office button and choose Word Options. Click the Advanced group and scroll down to find the Use Insert the key to control overtype mode option and check it. To always start in Overtype mode check the Use overtype mode checkbox too. Click Ok and you're done.

Now the Insert key performs like you expect it to, but don't come complaining to me if Word eats your words, remember - you asked for it.

Labels: , , ,

Add to Technorati Favorites

Wednesday, August 8, 2007

Office 2007 - DIY Keyboard shortcuts


I use Control + S to save an Office document on the fly and it's something that is so automatic that I just do it, hundreds of times a day.

There are other things I'd like to do as quicky but which have no shortcut key assigned to them. In Office 2007 this is an easy situation to rectify.

To create your own keyboard shortcut, click the Office Button at the top left of the window and choose Word Options, Customize. You'll see a Customize button next to a Keyboard Shortcuts option, click it and you can create a shortcut for any Word command of your choice as well as for symbols, fonts and the like.

What is particularly useful is that there's a list of items which aren't included on the Ribbon that you can still access if you ycreate your own custom shortcut to do so.

Labels: ,

Add to Technorati Favorites

Monday, July 30, 2007

Don't spell check this!


You know how it happens. You type something that is HTML or Javascript into a document or you type the famous "Lorem ipsum ... " text or a French phrase or two and suddenly your document is littered with red underlines. The Spell check can't handle it all. Now I like my documents to be pristine and neat so I tell Word to bypass spell checking these words since I'm happy they are spelled just fine.

To do this, select the text you DON'T WANT to be spell checked. Choose Tools, Language, Set Language and click the Do not check spelling or grammar option and click Ok. Now Word spell checks all your document and just skips the stuff you don't want checked.

Labels: , ,

Add to Technorati Favorites

Thursday, July 12, 2007

Don't look now! WordArt in Word 2007


If you've tried the new WordArt tool in PowerPoint 2007 you've probably discovered how neat it is. No more bent words in putrid magenta colors and instead, theme aware text that looks great for headings and which will change color when you change the Theme.

Try the same thing in Word 2007 and you're in for a ghastly surprise. WordArt missed out on getting a makeover in Word 2007 and, instead, it's the same application it has always been - functional but requiring a lot of additional work on behalf of the user to make it look even half good.

Here's hoping that the next implementation of Word, whenever that appears, finally does away with this and gives us WordArt that is usable and as functional as that in PowerPoint 2007 and Excel 2007.

Labels: , , ,

Add to Technorati Favorites

Tuesday, June 5, 2007

Blog from Word 2007


One of the coolest features in Word 2007 is the ability to blog from Word.

To do this, click the Office Button and choose New, New Blog Post. Click the Register Now button and choose your blogging tool, it's Blogger for me. Enter the details of your account and choose the picture option to use for uploading images. If you have multiple blogs running from the one account, choose the blog to use with Word. It's very simple then to create posts and upload them without having to
crank up your browser.

Labels:

Add to Technorati Favorites