Lightroom: More Adjustment Brush techniques
You just gotta love the Adjustment brush in Lightroom 2. It makes Lightroom a great tool for quick fixes and, honestly, I've used Photoshop a lot less since I started using Lightroom. I love the combination, Lightroom is fast and so smart and Photoshop is there for when I need specialist effects. So, on to today's post...
In an earlier post I talked about using the Adjustment Brush in Lightroom 2 at a simple level - sort of Adjustment Brush 101. In this post I’ll show you some advanced features of the adjustment brush which help you make multiple adjustments to the image at one time and to do so more easily. Consider this Adjustment Brush 102.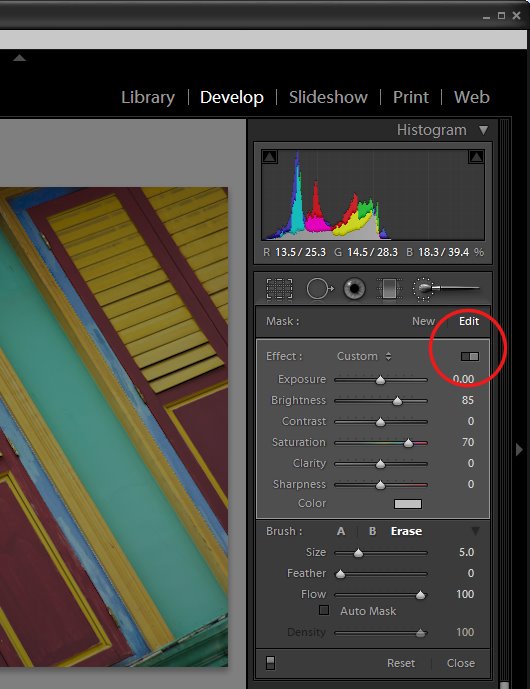
In the Develop module, when you have the Adjustment Brush selected there is a switch that you can click to switch between Button and Slider mode. In button mode you can adjust one of the Exposure Brightness, Contrast, Saturation, Clarity and Sharpness settings at a time. In Slider mode, you can adjust any one or more of these options.
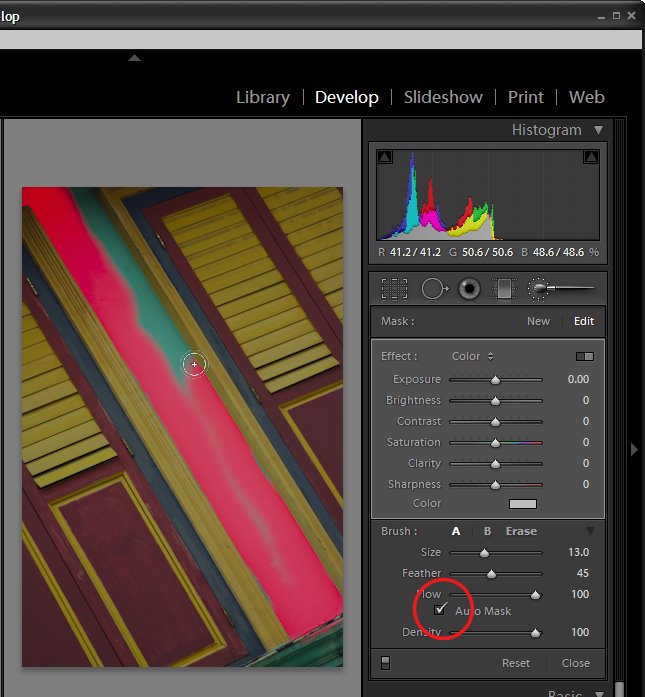
In the Brush area of the panel you will see an AutoMask option. When this is enabled, you can paint around the inside edge of an area and the AutoMask feature will mask the area ensuring your brushstrokes don't go over the edge. This works best on areas where the edge is distinct and recognizable. When you paint, make sure you have the main part of the paint brush inside the area you want to effect.
To toggle between AutoMask being on or off as you paint, hold the Control key as you paint (Command on the Mac). 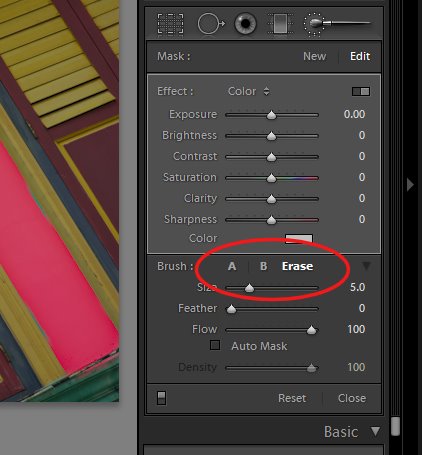
In the Brush area you will see two brushes, A and B. You can switch between the two by clicking on the A or B indicator. Each brush has its own Size, Feather, Flow and Density settings, and AutoMask can be enabled for either or both of the brushes. Having two brushes lets you configure each differently and switch easily between the two.
Each brush can be switched into the third brush mode - Erase mode by holding the Alt key (Option on the Mac) as you paint with either brush.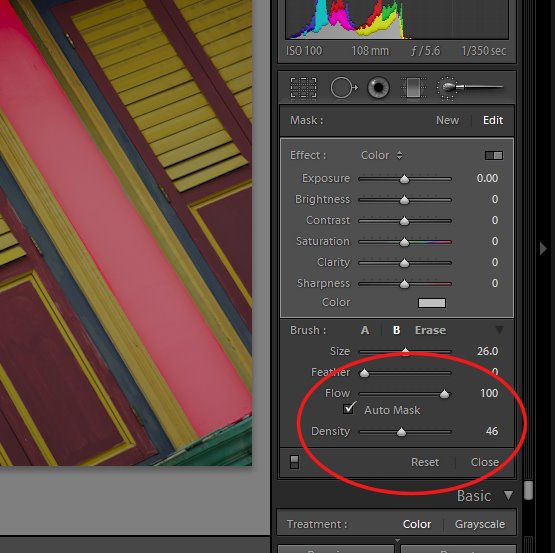
Setting the brush size defines the area of the brush and it is the central circle which you see when you are painting. The Feather amount adds an additional softness to the brush which is shown by the second outer circle. A hard brush has a Feather of 0 and it shows as a single circle.
Flow specifies the flow for the brush which can be set to less than 100 so you can build up an effect gradually by painting over an area multiple times. The Density slider adjusts the opacity and controls the maximum opacity of the brush strokes. So, if you have Flow set to a low value and Density to 50, the maximum opacity that the brush can reach regardless of how many times you paint over an area is 50. 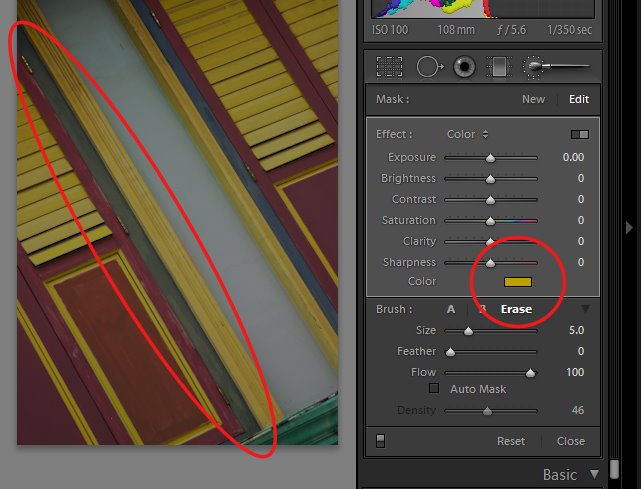
In the Effect area is a Color option which allows you to paint over an image with a color of your choice. To do this, select the color to use and then paint over the area to apply it to. You can use this to colorize a black and white image or, as I've done here, paint over a dark blue area with yellow to make it dark green.
Tip: Interested in learning more about Lightroom? Check out my post on understanding Clarity, Vibrance and Saturation in Lightroom 2.
Labels: Adjustment brush, fixes, Lightroom 2, technques
posted by Projectwoman @ 11:28 AM
0 Comments
Links to this post
![]()
![]()
