Wednesday, September 30th, 2009

Plan a Family Photo Shoot


These candid photos where shot inside in front of a shawl hanging over a picture rail as mother and daughter played around and posed for the camera.

Are your memories of a family photo shoots memories of dressing up in your best clothes and sitting for hours in a hot studio blinded by the camera flash? Or were you a bridesmaid at a wedding where you endured hours of being photographed in a dress that resembled a lousy Christmas tree decoration? If so, you may not have fond feelings for photo shoots. They don’t have to be this way. With a digital camera and a sense of fun, you can turn a family photo shoot into fun for everyone.

Why digital rocks
A digital camera is a big plus at a family photo shoot – it’s so easy to get great pictures so there’s no pressure to get a perfect photo each time. If someone blinks or coughs or if your son makes donkey ears behind your daughter’s head – take another shot. You don’t have to print anything that’s not great.

Prepare well
However good a digital camera is, it can’t perform miracles! You need to prepare.

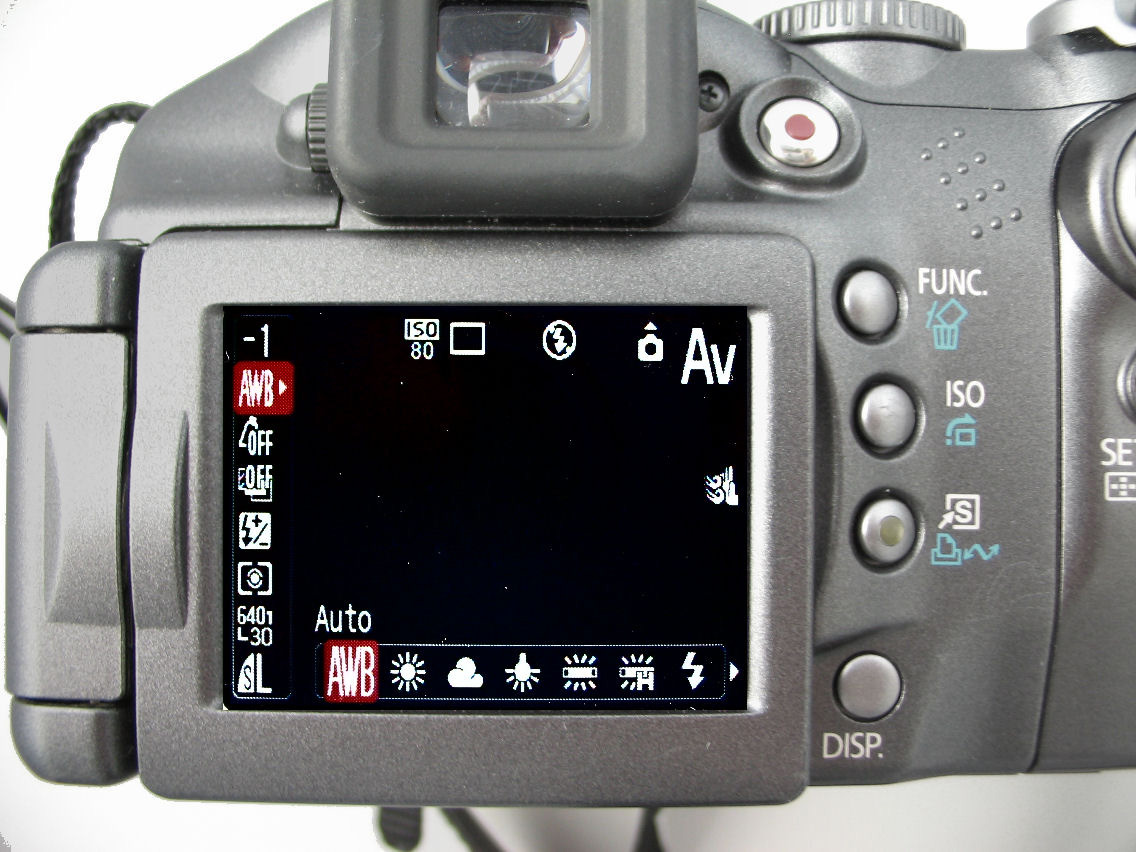
* First (and most importantly), make sure you know how your camera works. If you’re not comfortable with it, practice first until you are confident using it.

* Make sure you know how to set the delay timer if you plan to set up the camera to shoot on its own.

* Have a tripod handy to steady the camera.

Play dress ups
Organize every one’s clothes so they coordinate. A simple solution is to get everyone into a white or black T-shirt and blue jeans. Alternately, plan for clothing colors that work well together – all pastels, all darks etc.

Settle for solid colours in preference to patterns or florals.

Avoid clothes with logos on them unless there is a really good reason to wear them.

Location, Location, Location
Scout out a suitable location to use, here are some ideas:

* a local park in springtime is a good place because there are plenty of flowers to add color and there will be chairs and tables or swings and roundabouts that everyone can sit on.

* If you must shoot indoors find a room with light walls, lots of natural light and shoot on a sunny day with all the windows and blinds open.

* make sure you have an uncluttered and neutral background behind your subjects. Place people close to the light source to ensure they’re well lit.


Encouraging everyone to move in very close resulted in this photo that shows the close relationship between these siblings and their mum.

Never at night…and flash in the day
Never do a family photo shoot at night if you don’t have to – the flash will wash out the colours in everyone’s faces and the photos won’t be flattering.

On the other hand, if you’re photographing outside on a sunny day, turn your flash on (yes, On!) so it is forced to fire. When you do this, you will ensure that people’s faces aren’t marred by unsightly shadows.

Let kids be kids
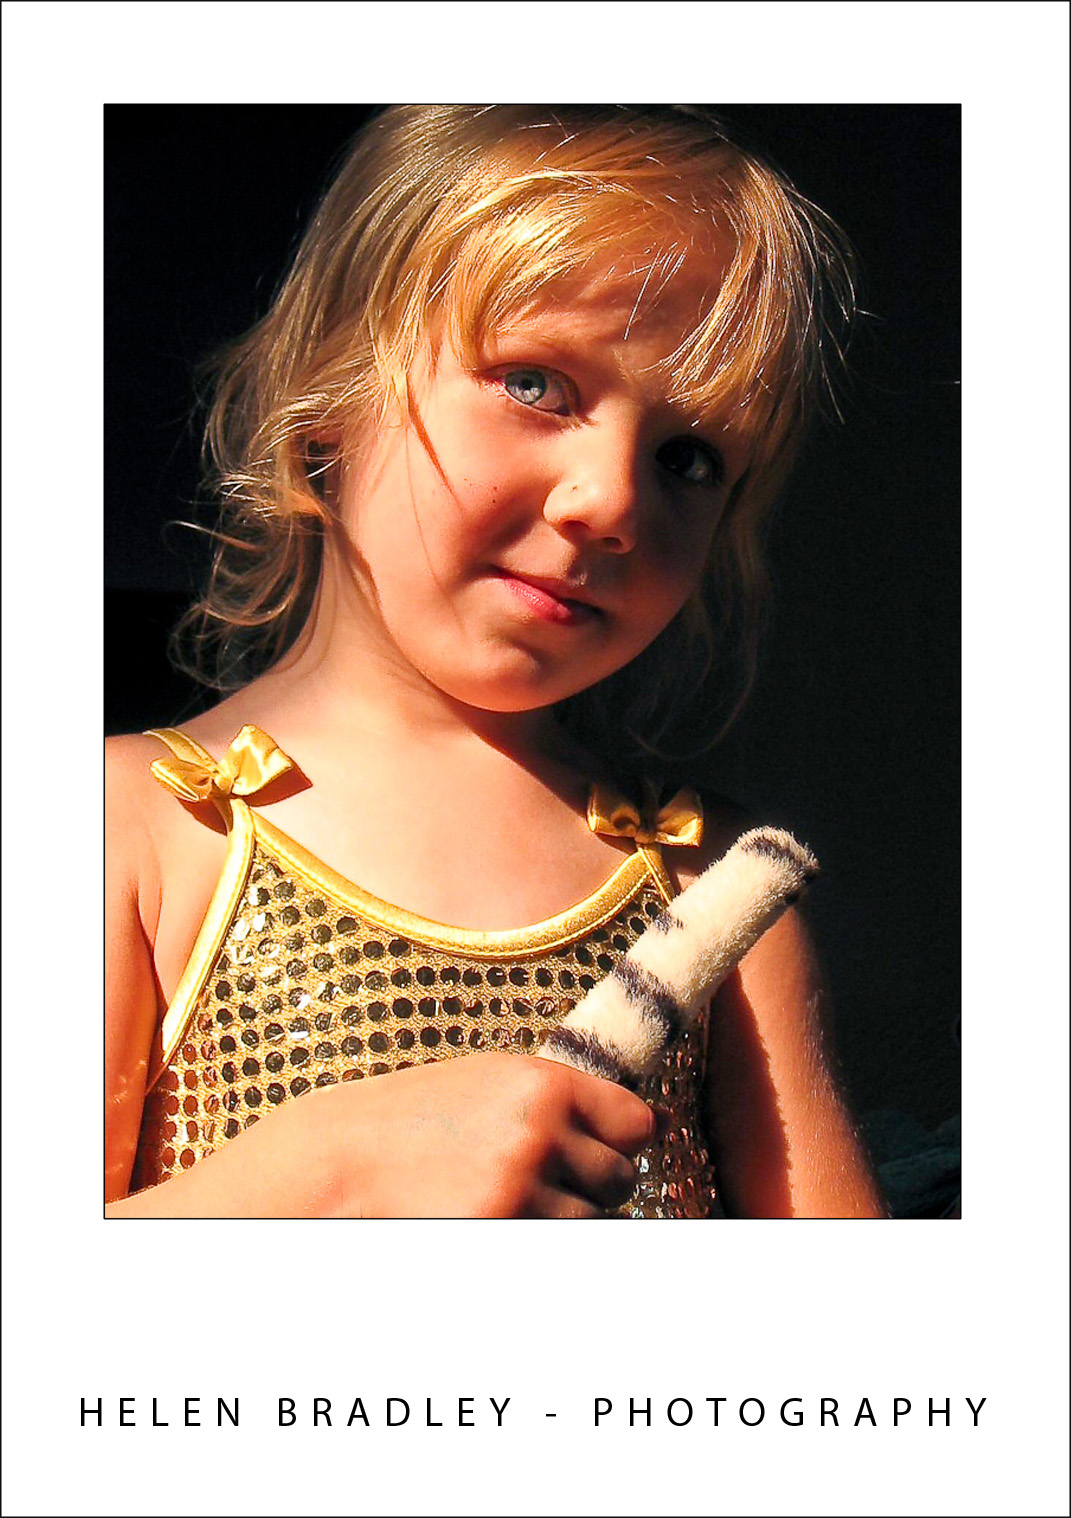
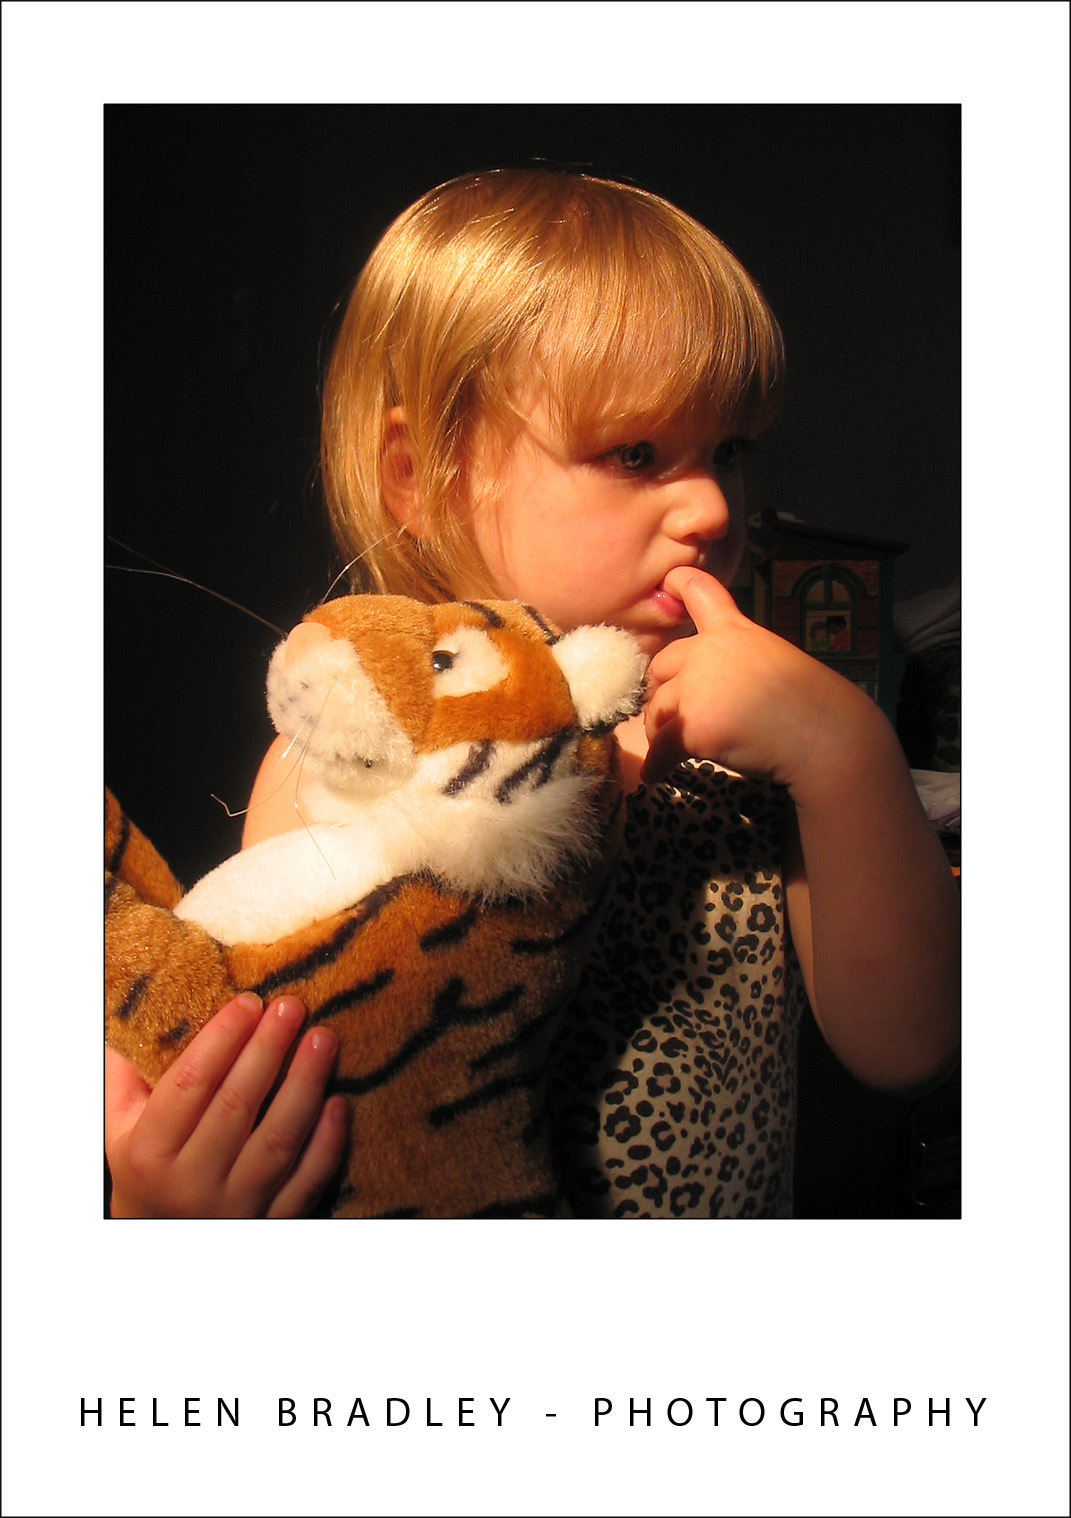
If young kids insist on taking their favourite doll or toy with them, all the better – they will be more comfortable if they have familiar items around them.

When shooting, spend time with each child and take a series of photos of them by themselves (with and without the toy).


Although shy at first, this youngster soon warmed up to the task of being photographed as these pictures show.

Pair up the children too and take photos of them interacting with each other. Provided you have plenty of storage on your camera’s card, shoot lots of pictures taking time out occasionally to make sure they are focused and framed attractively.

If you’re shooting active young children, put your camera onto sports mode to speed up the shots so you freeze the action and don’t get out of focus pictures.

Enlist the help of a friend to look after the younger children while you take photos of the older ones. If that friend is also able to use the camera, he or she can take photos of all the family together.


When photographing a baby, have one parent hold the child and then photograph up close.

If your make your shoot fun and if everybody is laughing and enjoying themselves, you will get some wonderful candid shots that show your family as they really are.

Don’t forget to take plenty of photos – any empty space on your memory card at the end of the day is a wasted opportunity.

Helen Bradley

Wednesday, September 23rd, 2009

Photographing Indoors

Here are some tips for capturing great indoor photographs anytime:

Day time indoors
When photographing indoors during the day and when there is some light available, use it to light your subject.

Open the blinds or curtains on the side of the house which has the most light and put your subject where they will be lit by what sun or light there is available.


Use the light you have – here a skylight has provided all that was needed for a great daytime indoor photo.

Always check the background for the shot – cleaning up messy backgrounds is a task you can avoid by not capturing them in the first place.


Here the photographer, my friend Brenda, composed the photo in the camera’s viewfinder and used the Christmas tree as an alternative to a more distracting background.

Night time indoors
At night indoors, you need to use what light you have available. You may have already have discovered that your camera’s flash doesn’t always flatter your subject. If you can, use overhead lights and strategically placed lamps to light the scene and give it some warmth.

Place desk lamps and other directional lights outside the camera range and use a table lamp to give the scene a visible light source and to provide a warm glow to the subject’s skin.

You can also use candle light to produce a warm glow in your photos – just take care when you use them.


Another shot from my friend Brenda, here the lamplight adds a friendly glow to this image making it look warm and comfortable even though there’s snow outside.

Camera settings
When you shoot in low light you may find your point and shoot camera keeps the shutter open for a longer than the usual period of time to capture the scene. Often this is too long for you to hold the camera still.

Place the camera on a tripod to steady this, this helps you take longer exposure images and reduces the chance of the camera moving. If you don’t have a tripod, place the camera on table or bookshelf to steady it.

When you are taking images using a longer exposure, ensure that the person being photographed understands this so they stay still long enough for you to capture the shot.


Flash light isn’t a bad light all the time – here it compliments this subject and produces a great night time portrait.

Helen Bradley

Tuesday, September 22nd, 2009

Outlook – Disable Contact Editing

By default in Outlook 2007 you can edit your contact information from any view including the Contact card view.

If you find yourself making changes by accident you can disable this feature so that contacts can only be edited by opening the Contact’s information dialog.

To do this, select the Contacts folder and display the view you don’t want to be able to edit in. Choose View > Current View > Customize Current View > Other Settings and disable the ‘Allow in-cell editing’ checkbox.

Now you can look at the contacts but you won’t be able to change them without switching to another view.

Helen Bradley

Friday, September 18th, 2009

Understanding the need to White Balance

When filming indoors using light such as tungsten globes or florescent light, the color of the light will show in the photo.

Tungsten globes cast an orange colour on your photo and florescent light will give it blue/green look.

Your camera will have a setting that will let you compensate for these different color lights – it’s called White Balance.

While light settings peculiar to shooting on a sunny day or a cloudy day are probably easy to find on your camera, the settings that adjust for artificial light are usually tucked away elsewhere.

Check your camera’s manual to see how to adjust for artificial light so you ensure your photos don’t have a distracting colour cast. Most cameras, when they adjust for the light, show the adjusted image in the preview display so you can check you’ve got the right setting.

When using a flash you won’t generally need to adjust for the colour of surrounding light as the flash will cancel this out.

** In the image above, the same cup has been photographed in tungsten light with two different camera white balance settings. The right hand one (tungsten) correctly balances the orange color cast the one on the left (Auto, the default setting) leaves a bad color cast.

Helen Bradley

Friday, September 18th, 2009

Understanding filters in Photoshop and PS Elements


When I was young, my dad told me that if at first you don’t succeed you should try and try again until you do. In today’s post, I am going to tell you why this adage relates to editing photos by working with filters in Photoshop Elements and in Photoshop.


Not good! start with the wrong colours and filters suck, big time!

Step 1
Start by opening an image that you like, set the foreground color to white and the background color to black and choose Filter > Distort > Diffuse Glow. When you do this, the image will take on a rather nasty dark glow. There is pretty much nothing that you can do to this image that is going to make it look good. You can try to remove the graininess and glow and increase the clear amount to 20 but if you do that, you’ve effectively removed the filter effect. The short answer is it looks ghastly and you might be wondering just what you did wrong?


Same image, better result, it’s the colors that are the difference

Step 2
Exit the Filter Gallery, switch the foreground and background colors so that black is now the foreground color and white is the background color. Reapply the filter using Filter > Distort > Diffuse Glow. This time the filter looks very different.

The explanation is that Photoshop Elements (and Photoshop) use the foreground and background colors when applying the filter. This time go ahead and crank up the Graininess and adjust the Glow Amount until you get a nice glow on your image. Adjust the Clear value to suit and click Ok. Now you have a very different looking result.


Understanding colors and filters
There are many of Photoshop Elements Filters that work differently depending on the current foreground and background colors settings. The Halftone Filter is one of these so, for example, if you have red and green selected the halftone pattern will appear in red and green – not always the desired look.


Instead, set the foreground to black and the background to white and apply the Halftone Filter using Filter > Sketch > Halftone Pattern. This time you’ll get something more like the result that you are looking for.


Switch black and white in the color swatch and try again – and the result is different and not so appealing.

What you need to know
The short lesson to take away from this post is that when you are applying filters in Photoshop Elements or in Photoshop the foreground and background colors that you have selected will have a big impact on how some of the filters work. In most cases the filters affected are the Sketch filters but others use the colors too.

Select the right color mix and the result is pleasing to the eye. Select the wrong color mix and you could be excused for thinking filters just aren’t for you.

Helen Bradley

Thursday, September 17th, 2009

Fixing keystone issues in Photoshop Elements


One issue you’ll often encounter when you photograph tall buildings is a keystone effect caused by the angle at which you are forced to photograph from. The bottom of the building often looks wider than the top making it look out of proportion.

Most photo editing programs have tools for fixing keystone problems and, in this post, I’ll show you two methods you can use in Photoshop Elements both of which work the same way in Photoshop.

Method 1: The Move tool

Step 1
The first method involves using the Move too. Start by converting the image Background layer to a regular layer by double-clicking it and click Ok.

Step 2
Enlarge the image canvas by selecting over it with the Crop tool and let go the mouse button. Then drag the crop handles outwards to select a larger area around the image and press Enter to fix the selection. You need to enlarge the canvas or the process will end up cutting off some of the image.

Step 3
Ctrl + Click on the layer thumbnail for the image to select the image but not the extra background.

Click the Move tool to select it and hold the Ctrl key as you drag on one of the corner handles. When you do this you’ll notice that you distort the image – you’ll use this feature to straighten it.

If you choose View > Grid you can display a grid over the image to make it easier to see line everything up. Choose Edit > Preferences > Grid to change the grid dimensions if necessary.

Drag each corner of the image in turn and, if desired, rotate the image until it looks correct to you. When you are done, turn off the visibility of the grid (View > Grid) and Crop the image to remove any excess.

Method 2: The Correct Camera Distortion filter

Step 4
The second method uses the Lens Correction Filter. Select Filter > Correct Camera Distortion and the image will open in the filter dialog. From the Size dropdown list select Fit in View so that you can see the entire image.

Enabling the grid helps you ensure the image is squared off nicely. If necessary, drag on the Angle to rotate the image – in this dialog, the scrubby slider method works best so drag on the word Angle to adjust the angle (not the dial which tends to jump around a lot).

Select the Vertical Perspective slider and drag it to adjust the vertical perspective of the building. Choose Horizontal Perspective to fix horizontal perspective issues.

Step 5
The Correct Camera Distortion filter also includes a Remove Distortion slider which helps fix the sucked in or blown out effect you often see around the edges of an image caused by the curvature of the lens.

You can extend the canvas around the image by dragging the Scale slider to the left or drag to the right to crop the image.

When you’re done click Ok.

These tools also work well to fix an image of any rectangular object which is out of proportion – big or small.

Helen Bradley

Wednesday, September 16th, 2009

Outlook Send a Contact’s details via Email

To share an Outlook Contact’s details with someone else you can send it via e-mail.

This lets you get the details you have recorded about a contact to someone else without having to pull all the details across manually. It’s simple and quick.

To do this, select the Contacts module and open it. Double click to open the contact’s details that you want to send to someone.

From the Contact tab on the Ribbon click the Send dropdown list and choose In Internet Format (vCard).

This opens a new message dialog with the details attached in a .vcf format file. All you need to do is to enter the recipient’s email address and your message and click Send.

When the recipient receives the message, they can click the attachment to open it and add the person’s details automatically to their Contacts list.

Helen Bradley

Monday, September 14th, 2009

Lightroom: Add a light source


The Lightroom Graduated Filter tool can be used to add a secondary light source to an image where one was not in existence when you shot it. This often works better to rescue an unexposed area of an image than, for example, applying a Shadow/Highlight fix in Photoshop.

This image is extremely dark on the right – a problem caused by capturing the carousel horse in broad daylight on a very sunny day..

After adjusting the Exposure in Lightroom and tweaking the image using the small Recovery, Clarity and Vibrance sliders the image is still dark in areas where I would like to see more of the detail in the underlying image.

To bring in some light on the right, click the Graduated Filter tool and drag the selector in from the right edge of the image so that the midpoint of the filter is over the point where the problem ceases to exist (around the level of the carousel horse’s eye).

With the Effect Sliders visible, increase the Exposure and then, if desired, adjust the Brightness and Clarity sliders. Click Close when done.

In many cases you will find the Graduated Filter gives better results than, for example, the Shadows/Highlights filter in Photoshop shown here, and it’s a lot less work.

If you’d like to learn more about using the adjustment tools in Lightroom, here are a couple of useful recent posts:

Fixing Blemishes in Lightroom

Spot fixing with the Adjustment Brush

More Adjustment Brush techniques in Lightroom

Helen Bradley

Saturday, September 12th, 2009

Better Travel Photography #5 – Get in close

Do your travel photographs look just like everyone else’s?

If you wonder why you bothered lugging your digital SLR half way around the world and didn’t just settle for buying postcards, it’s time to revisit the way you photograph your travels. Here is part 5 in my new series of Better Travel Photography – a guide to getting great travel photos that don’t look like everyone else’s..

Today’s tip: Forget the big picture and get in close

Some attractions are just plain difficult to capture close up – if you’ve visited the Eiffel tower you know as soon as you’re down the bottom of it, there’s no way to capture all of it. It’s just too big.

In this situation, look for some interesting detail to shoot and forget about trying to jam everything in.


These are the feet from a statue of Caesar in Rome, while the entire statue makes a great photo, his feet make an even better one.

It’s surprising how little of an object you need to capture for it to still be unmistakably recognizable as, for example, the Eiffel tower but, at the same time, to look more artistic and less run of the mill.


You know this number plate is very old – you don’t need to see the car to know this – the image carries the message.

Helen Bradley

Friday, September 11th, 2009

Batch Resize


While it’s relatively easy to write an Action to resize a series of images in Photoshop, it’s easier still to get Photoshop to do all the work for you. Photoshop comes with an image processor script that will open, resize and save a series of images for you – very quickly.

Step 1
Choose File > Scripts > Image Processor. The image processor dialog shows a simple four-step process for resizing the images.

Step 2
In Step 1 of the dialog, select to either resize the images already open in Photoshop (if you have them open), or click Select Folder and select a folder of images to resize. Select Include all Subfolders to include all subfolders of the selected folder.

Step 3
In Step 2 of the dialog select where to save the images. If you select Save in Same Location Photoshop creates a subfolder in which to save the images so you don’t have to worry about overwriting them. If a subfolder by the same name already exists with images with the same names in it, Photoshop saves to that folder but adds a sequential number to the file so you still won’t lose your files. Alternatively, you can select a different folder for the resized images.

Step 4
In Step 3 of the dialog select the file type to save in. For the web Save as JPEG is the obvious choice. Set a Quality value in the range 0 to 12 where 12 is the highest quality and 0 the lowest. For better color on the web, select Convert profile to sRGB and ensure that Include ICC Profile at the foot of the dialog is checked so the profile will be saved with the image.

To resize the images, select the Resize to Fit checkbox and then set the desired maximum width and height for the final image. For example, if you type 300 for the width and 300 for the height, the image will be resized so that the longest side of any image, whether it be in portrait or landscape orientation will be 300 pixels. The images are scaled in proportion so they won’t be skewed out of shape.

The Width and Height measurements do not have to be the same so you could, for example, specify a Width of 400 and a Height of 300 and no image will have a width greater than 400 or a height greater than 300.

Step 5
If desired you can save in another format as well by selecting its checkbox so you can save the same image in different formats and at different sizes in the one process. You can also select to run an Action on the images, if desired.

When you’re ready, click Run and the images will be automatically opened (if they are not already open), resized, saved and closed.

To see your resized images, choose File > Open and navigate to the folder that you specified the images to be saved to. If you chose to save as JPEG, the images will be in a subfolder called JPEG, for PSD in a folder called PSD and so on.

So whenever you need to resize a lot of images for uploading to the web, for example, the Photoshop Image Processor script makes the job almost painless.

Helen Bradley

Page 1 of 212