|
|
|
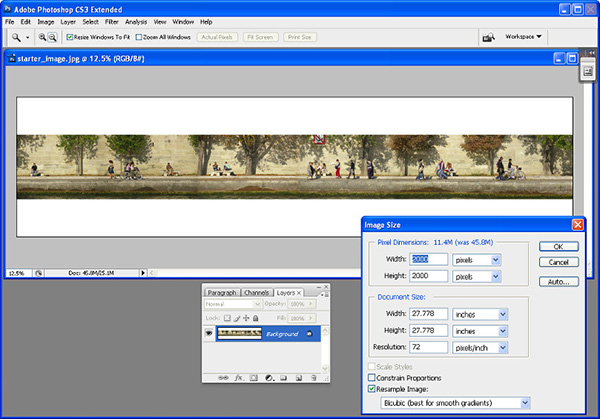
Make a Photoshop Planet Helen Bradley Whatever you call them, mini planets, amazing circles, 360 degree panoramas or spheres, We'll show you how to make them - step by step.One of Photoshop's neatest tricks resides in its filters collection. The Polar Coordinates filter can be used to create mini worlds from 360 degree panoramas. Even if you don't have a panorama you can still create a mini world with a horizontal image that could wrap into a circle. If you don't have a panorama image there are other applications for this filter that work with just about any image. All about mini worldsTo see what the mini worlds can look like visit http://tinyurl.com/3d7zez and http://tinyurl.com/3cvehs. There you'll see spectacular examples of 360 degree panoramas turned into mini planetary worlds. It is easy to do with Photoshop or any graphics program that contains a polar coordinates filter. The other applications for the polar coordinates filter result in more abstract images than these. Prepare the imagesThe images used in the step-by-step example are a series of individual images taken along the Seine in Paris on a Sunday afternoon. Each image in the series was straightened and then assembled side by side into a long image and blended where they overlapped to create a seamless result that will wrap around and join end for end. The faux panorama was then cropped and saved as a file that can be reused any time. To create the world, flatten the image by choosing Layer, Flatten Image so the image is a single layer. Once the image is flattened, use the Image > Canvas Size tool to add canvas to the top and bottom of the image. You'll need some at the top and more across the bottom. The colour at the top becomes the outside colour so white is a good choice. The colour at the bottom appears in the middle of the circle. A good relationship between image width and height is an image four times as wide as it is tall. Once you have created the canvas you're ready to create your circular world using step by step instructions. There are groups on Flickr that show images created using the polar coordinates filter and which are called Amazing Circles. These are complex abstract images and they're created by applying the polar coordinates filter twice. The result is more an abstract effect than the mini worlds and you can use any image to create the effect. To do this, select a square crop from the image. Choose Filter > Distort > Polar Coordinates and choose the Polar to Rectangular option and click Ok. Rotate the image 180 degrees by choosing Image > Rotate Canvas > 180 degrees. Now apply the polar coordinates filter again this time selecting the Rectangular to Polar option to create your Amazing Circle. Amazing Circles and the mini worlds are just another way you can use Photoshop creatively in your work Create your circleStep 1 Use the Image > Image Size tool to size your image to a square. To do this, disable the Constrain proportions checkbox and take the largest measurement in the dialog - either the width or height - and set both measurements to the same value. Click Ok.
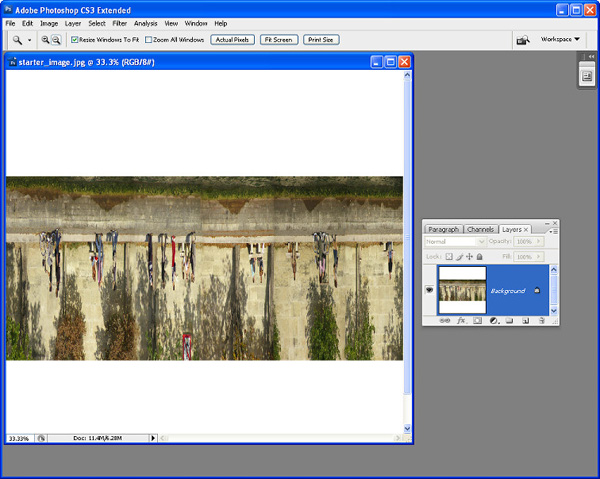
Step 2 This gives you a large distorted square image. To create the circular world, choose Image > Rotate Canvas > 180 degrees. This rotates the image so that the top is now at the bottom. If you don't do this your world faces inwards and not outwards - it still works but it just looks different.
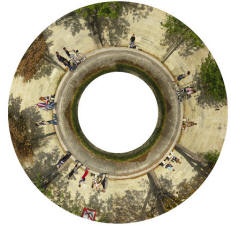
Step 3 Choose Filter > Distort > Polar Coordinates, select the Rectangular to Polar option and click Ok. This gives you your donut shape world. Because you added extra canvas to the top and bottom of the original image, the centre and outside edges are now this colour. If the image doesn't blend seamlessly where it joins, use the clone stamp tool to blend the seam.
|
|
|
(c) 2019, Helen Bradley, All Rights Reserved. |