|
|
|
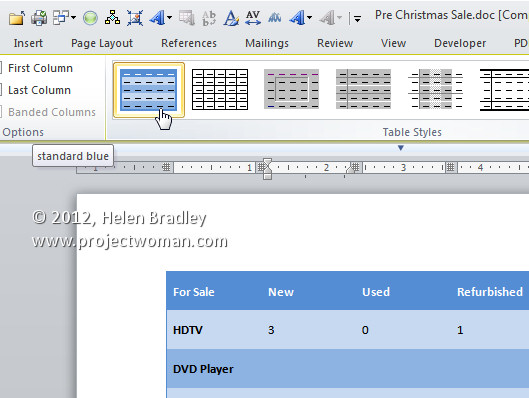
Custom Formats for Your Word TablesWord tables can be formatted using the built in formats or, with a little effort, you can create your own custom reusable formats.Word lets you select from a range of formats to make your tables look great. You can make them look even better with your own custom designs. So, from changing a font to laying out an entirely new table design here's how to put your own mark on your Word tables. Custom formatsTo have Word automatically format tables for you, click inside the table and choose Table Tools > Design tab. The Table Styles gallery offers a series of preformatted table options – when you mouse over one, the table appears formatted with that option.
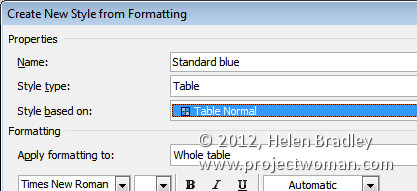
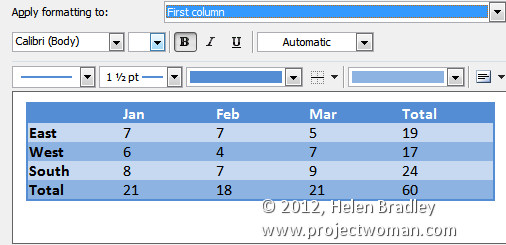
When you find a format you like, select it to apply it to the table. then configure options for extending the format to the Header Row, Last Column, First Column and the Last Row using the options at the far left of the Table Tools > Design tab. Set your own table style propertiesYou can use the options in the Modify Table Style dialog to configure your own table format that you can apply in future to your tables. Let's see how this can be done. Assume you want a table that has no vertical borders and only horizontal lines but it should have a border all around it. The top row is a heading row and it should have white text and a navy background. The remaining rows should alternate between pale blue and a darker blue with regular text. The text in the first column and the heading row should appear formatted in bold type. The text in the table should be centred vertically in the cells. To start, choose Table Tools > Design tab and from the Table Styles list choose New Table Style to display the dialog. Click in the name area and type a name for your new Table style. Make this descriptive of the table, for example, Standard Blue. Select a table style to base yours on. It's best to choose a simple style in case the style gets altered in future. If changes are made to the style you have based this style on then it will cascade down to your style and change it too. A really sensible choice would be Table Normal as it has no lines and no text formatting and you're unlikely to alter it.
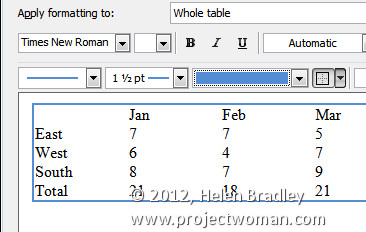
Now determine which of the formats you'll configure first. To configure the table borders, set the Apply formatting to option to Whole table and configure the line option to the colour and size to use. Now click the All Borders button and choose Outside Border and Inside Horizontal Border to set these on. If you want different weight or colour borders, configure these options one at a time setting the colour and line option before you select each border type. You can also configure the alignment to Align Center Left while you are formatting the whole table.
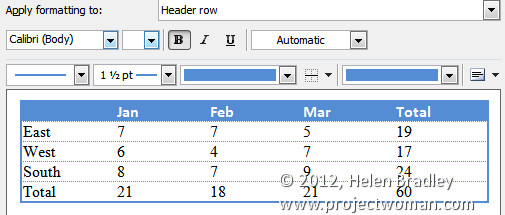
When creating an AutoFormat you must define the line features before creating the line itself. To format the top table row, from the Apply formatting to dialog choose Header Row and format it with a blue fill, white and bold text using the buttons in the dialog.
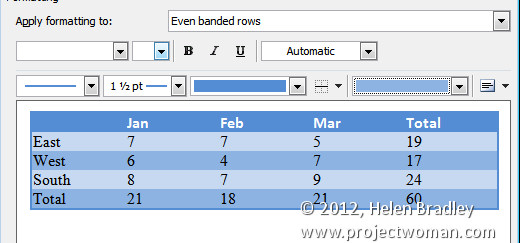
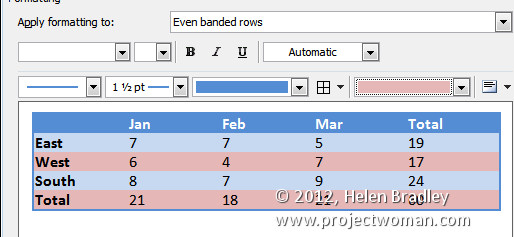
To format the stripes, choose Odd Banded Rows from the Apply Formatting to dropdown list and configure these to a light blue fill. Select Even Banded Rows from the Apply Formatting to drop down list and configure these to a different blue fill.
To configure the first column choose First Column from the Apply Formatting to list and then set it to bold type.
To make the new table format available to all new documents based on the current template - this template is most likely to be Normal.dotm - click the New documents based on this template option button and click Ok and then click it in the Table Styles gallery to apply your format to the table.
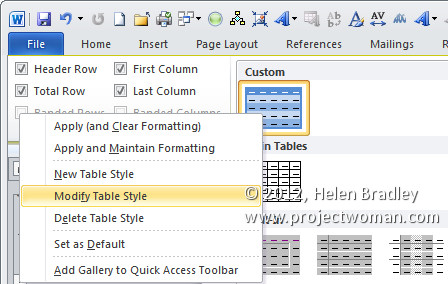
Update the Saved Custom Table FormatIf you need to make changes to the format at any time, click in a table and choose Table Tools > Design tab and right click your table format in the Table Styles list and choose Modify Table Style. Now go ahead and change the style as required.
Ensure you check the New documents based on this template option so the changes are recorded for all new documents based on Normal.dotm template.
It is easy to format alternate rows or alternate columns automatically using your custom AutoFormat.
Save a Format Someone Else has CreatedIf you receive a table formatted using a good looking table format from another user you can add the format to your own set of available styles.To do this, open the document and click in the table. Choose Table Tools > Design tab and click the table format in the Table Styles list. Right click and choose Modify Table Style and click the New documents based on this templatge option and click Ok and then Close. While you haven't modified the format it is now included in your Normal.dotm template and will be available to be used on any new tables you create using that template. |
|
|
(c) 2019, Helen Bradley, All Rights Reserved. |