

When you’re working on a very big worksheet in Excel sometimes it happens that when you print it out you get a stray row or column on a single sheet of paper. It’s not only a nuisance but it’s also a waste of paper.
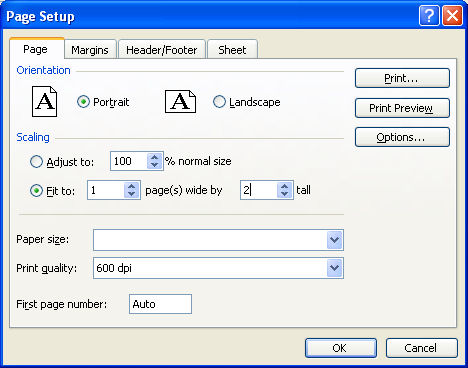
To ensure that this doesn’t happen choose File, Page Setup and click the Page tab. The Fit To option lets you specify the number of pages wide or tall that a worksheet is. Select the measurements that you want to fit, for example fitting to one page wide by one page tall will print everything on a single page.
What if you don’t know both measurements? Don’t worry, if you know you want it one page wide but don’t know how tall that will be, select Fit to 1 Page Wide and leave the Tall box empty – that means delete anything that’s in it.
This works the same if you know how tall you want it to be but not how wide. It’s a smart way of saving trees and frustration and it looks much neater than handing someone something with a skerrick of info on the last page.
An excel (Office 2000 Pro) document will no longer print full size. It previews OK but only fills about a quarter of an A4 page. Other excel docs still print as they preview. I can’t see what the difference is with the first one.