Office tips blog |
Photoshop/Photography Blog |
About me |
e-mail

|
Visual Basic Express - PT 1 - Getting Started by creating an image viewerHelen Bradley
|
 Helen
Bradley introduces you to Vi
Helen
Bradley introduces you to Vi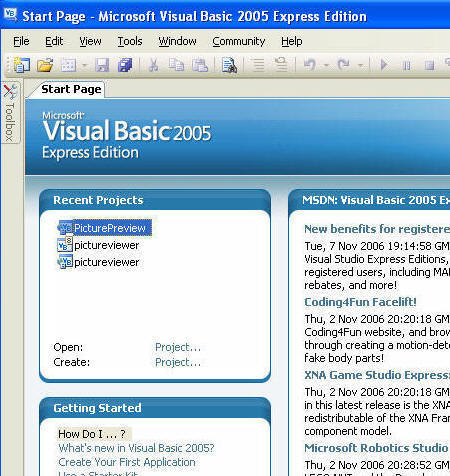
|
Control |
Property |
Value |
|
Form1 |
Text |
Picture Viewer |
|
OpenFileDialog1 |
Filter |
BMP (*.bmp)|*.bmp|JPG (*.jpg)|*.jpg |
|
Button1 |
Text |
Select folder |
|
Button2 |
Text |
Choose File |
|
Visible |
False |
|
|
Button3 |
Text |
Change Form Colour |
|
Button4 |
Text |
Close |
|
PictureBox1 |
Size mode |
Zoom |
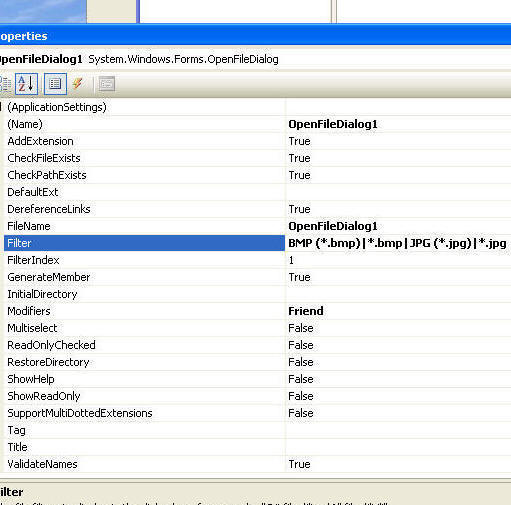
For each control you can configure its properties using the Properties pane, here we've entered the filter for the OpenFileDialog.
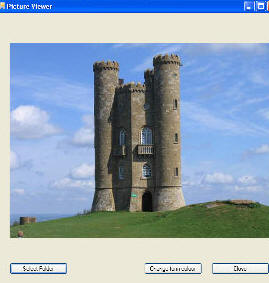
With the PictureBox1 selected, click the Image option in the properties dialog and click the ellipsis to open the Select Resource dialog. Click the Local Resource icon, click Import and locate a file on your disc that you want to be the opening image for the program. This image will appear every time you launch the program. Click Ok.
Select the FolderBrowserDialog1 and locate its SelectedPath property. Click the ellipsis to navigate to your My Documents folder or another folder you want to use as your default image folder.
Now the buttons have their labels in place, size them all to the same size by first sizing Button3 to the size it needs to be to display its text. Now click Button3, and hold Shift as you click on the other three buttons (you must select the largest button first). Choose Format, Make Same Size, Both to size all buttons the same size. Choose Format, Horizontal Spacing, Make Equal to arrange them equally across the form and choose Format, Align, Top to align them all so their tops are on the same level.
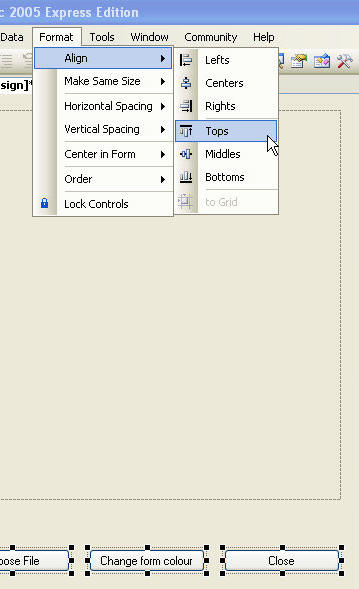
Use the Format options to configure the size and placement of the four buttons.
At this point you should have an image on a form on your screen. You can test the program by clicking the Start Debugging button on the toolbar. This runs the program and you will see the PictureViewer form on the screen. You should also see three of the four buttons. Nothing on this form will actually do anything at this stage because you have not programmed it yet. However you can move the form around on the screen, you can resize it and you can click its close button - the one in the top right hand corner of the window. Close it now and you're ready to continue.
Add the code
You’re now ready to add the code to the project. Before you do this save the project so that you will not lose the work done to date by choosing File, Save All and click Save to save the project.
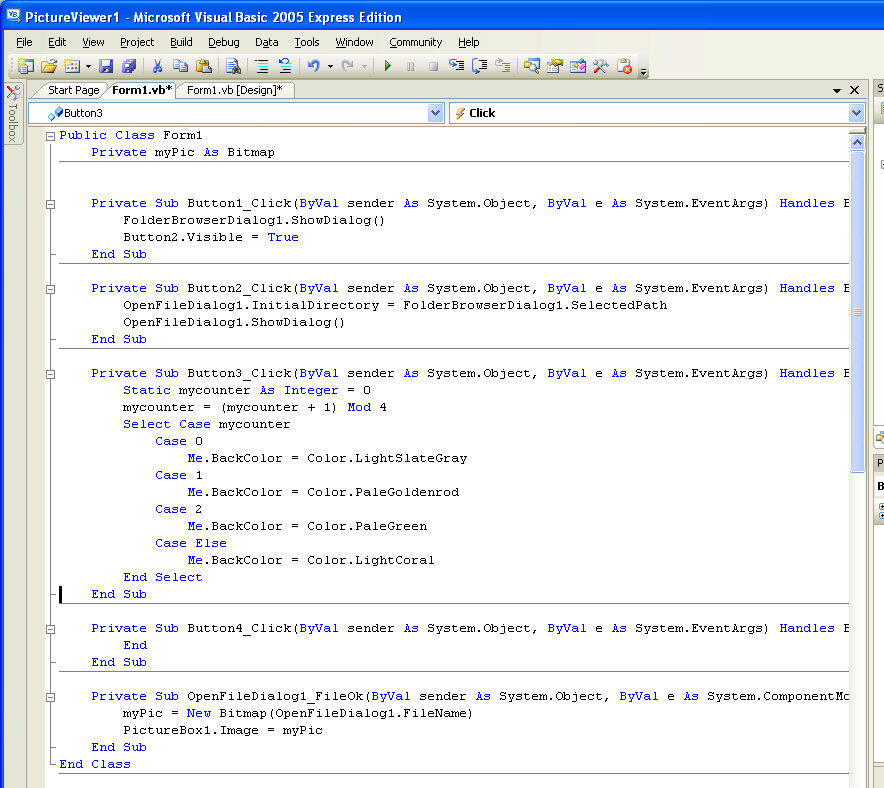
The View Code tab is where you type the code that does the work of displaying the chosen picture in the dialog.
To add the code to the project double click the Select Folder button (Button1) and type this code between the Private Sub and End Sub statements:
FolderBrowserDialog1.ShowDialog()
Button2.Visible = True
Double click the Choose File button (Button2)and enter this code between the Sub and End Sub statements:
OpenFileDialog1.InitialDirectory = FolderBrowserDialog1.SelectedPath
OpenFileDialog1.ShowDialog()
Double click the Change Form Colour button (Button3), and enter this code between the Sub and End Sub statements:
Static mycounter As
Integer = 0
mycounter = (mycounter
+ 1) Mod 4
Select Case mycounter
Case 0
Me.BackColor =
Color.LightSlateGray
Case 1
Me.BackColor =
Color.PaleGoldenrod
Case 2
Me.BackColor =
Color.PaleGreen
Case Else
Me.BackColor =
Color.LightCoral
End Select
Switch back to the Form Design view and double click the Close button (Button4) and type this code between the Sub and End Sub statements:
End
Return to Form Design view and double click the OpenFileDialog1 button at the foot of the screen and type this code between the Sub and End Sub statements:
myPic = New
Bitmap(OpenFileDialog1.FileName)
PictureBox1.Image =
myPic
Finally, in the Code window underneath the line which reads Public Class Form1, type this line of code:
Private myPic As Bitmap
Save your project again. Run the project by clicking the Start Debuging button and test to ensure that the project works. You should be able to change the background colour to one of four colours by repeatedly clicking the Change Form Colour button.
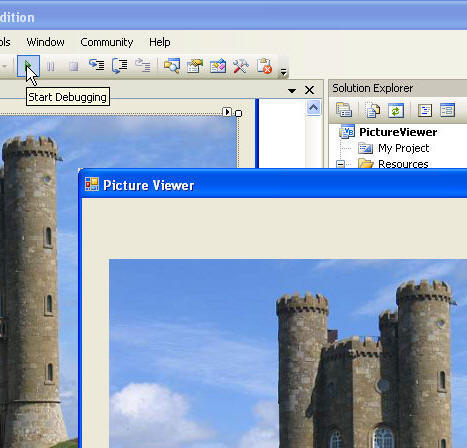
Use Start Debugging to test that the program works as you expect it to.
When you click the Select Folder button you can select a folder on your computer that contains images to display on the form. When you do this the Choose File button will become visible allowing you to select a file from the folder. Notice that the files of type list gives you the option of displaying jpeg or bmp files – it does this because you configured this as the value for the Filter property of the FileOpenDialog. When you select a file it appears in the PictureBox area on the form. Click the Close button to exit the project.
Program housekeeping
To view and run your completed project from outside the VB 2005 interface, choose File, Save All and then close your project by choosing File, Exit. You will find your project in your My Documents, Visual Studio 2005, Projects folder. Open the folder containing your project which has the same name as your project and locate the Bin, Debug folder. Your project's executable file will be found in that folder.
To open your project so you can work on it again, launch the VB 2005 Express program and click File, Open, navigate to your My Projects folder, open your project folder and then click the project's .sln file. This opens your project in the program window – you will find your form and code accessible from the Solution Explorer area.
How it works
Here's how the project works. When you click the Select Folder button, it launches the folder browser dialog which is one of the built-in Windows dialogs that you can access using VB. When you select a folder from the dialog it is stored in the SelectedPath property of that dialog. The second button on the form is then made visible so that it is clickable.
When you click the Choose File button, the directory for the OpenFile dialog is set to the path that you chose when you selected a folder. The OpenFile dialog is then displayed on the screen so you can choose a file.
When you choose a file and click Open, the OpenFile dialog's code loads the selected file as a bitmap image into the variable called MyPic. Then the PictureBox object's image property is set to this variable so the picture appears in it.
The third button simply uses a static counter to rotate through a series of colours for the background colour of the form. This is similar code to the code used in the change case macro for PowerPoint that is also on the cover disc.
When the Close button is clicked, the End statement forces the project to close.
In this project you have seen how to create a new project and how to place various objects on the form and set their properties so that their default values are configured. You have also seen how it is possible to programmatically alter these default values – this happened when you made Button2 visible, when you set an initial directory for the FileOpen dialog and when you set the image value to the image to display in the PictureBox object. You’ve also seen one of the methods that can be used to make choices in a program in the use of the Select Case statement. Finally, you learned how to save and reopen your project and where to find the executable file for it.
Next month, we'll look at how to design a simple program to perform a task and how you can use events such as clicking a button to make the program do its work.
Terminology
Event driven language - VB is an event driven programming language. You use it to create programs that respond to input from the user ("events") such as clicking a button or selecting a file.
Object - A thing such as a button or a form that the user can interact with.
Event - Something that happens to an object such as clicking it, holding your mouse over it. In VB, events are used to trigger code to be run.
Property - A characteristic of an object such as the colour of a button, the title on a form.
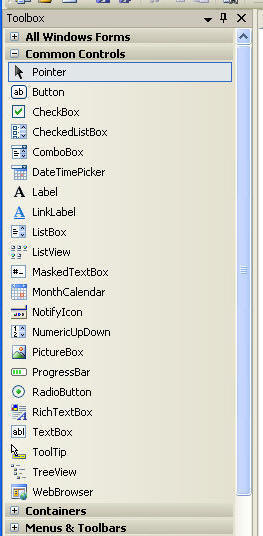
Control - A tool used to create an object on a VB Form, you choose these from the Toolbox. The term Control is sometimes used interchangeably with the term Object.
Article first published in Australian PC User magazine (c) Helen Bradley 2008-2009
