Working with adjustment layers
Helen Bradley
 When you want to perform a
removable and alterable adjustment to an image an Adjustment layer is a
great tool When you want to perform a
removable and alterable adjustment to an image an Adjustment layer is a
great tool
Sometimes the corrections you
make to your images you don't want to make permanently. You might want
the ability to come back later and change the adjustments or to remove
them or simply edit them. If you use the standard adjustment tools in
your software, the changes you make are permanently applied to the
images. You can't undo the effect later on. However, if you use an
Adjustment Layer to make the change, you have much more flexibility. You
can remove the layer, edit it or alter the settings as easily as you
applied the effects in the first place.
Adjustment Layers are a handy
addition to your photo editing tool kit and they're supported by
programs such as Photoshop, Paint Shop Pro and Photoshop Elements 2.
We'll show you how Adjustment Layers work in these programs and the type
of image adjustments you can make using them.
What is an
Adjustment Layer?
An Adjustment Layer is a layer
in your image which contains the information for making a change to the
image. For example, you may use a Levels adjustment layer to brighten an
image – when you do a new layer is created in the image's Layer palette
which produces the desired result. The Adjustment Layer affects all the
layers below it in the Layer stack – but does not affect those above it
– this is consistent with the way most layers work.
The Adjustment Layer can be
moved – so you can move it up or down the layer stack to alter what
layers it affects (all those below it). Some programs, notably Paint
Shop Pro 8 and Photoshop let you create layer groups (in Photoshop
they're called Sets), so that Adjustment Layers can be made to affect
only those layers in the layer group (or set) which are below the
Adjustment Layer.
You can also configure
Adjustment Layers so they only affect part of an image. So, for example,
if you have an image which is over exposed on one half and fine on the
other, you can have the Adjustment Layer which fixes the overexposed
side apply only to the affected part. You do this using a layer mask
which like any mask you can paint on with black, white or grey paint to
remove, apply or alter the transparency of the mask.
Typically the type of
adjustments you can make with Adjustment Layers are those which affect
image brightness and colour. In Paint Shop Pro there are Adjustment
Layers for Levels, Curves, Invert, Brightness/Contrast, Channel Mixer,
Color Balance, Hue/Saturation/Lightness, Posterize, and Threshold.
Using
Adjustment Layers
You can use Adjustment Layers
whenever you alter a photograph using an adjustment that could be done
using an Adjustment Layer correction. Some corrections aren't available
using Adjustment Layers and, in this case, if you want to be able to
undo the correction later on, you have to build into the file the means
to do so. For example, you can take a copy of a layer before you make a
change to it by right clicking it in the Layer palette and click
Duplicate. Rename this copy layer if desired then hide it by disabling
its layer visibility toggle button. Now you can go ahead and alter the
original layer safe in the knowledge that if something goes wrong or if
you want to undo the change you can simply make the duplicate layer
visible again.
Using
masks
One of the very powerful
features of Adjustment Layers is that they are editable. If you apply an
adjustment to an image and later determine you used too much or too
little of the effect, you can change this. Simply double click the
Adjustment Layer to open the Layer Properties dialog in Paint Shop Pro
or (in Photoshop double click the Layer thumbnail). Your original
settings will be displayed in the dialog and you can alter them if
required.
You can also adjust what parts
of an image are affected by the adjustment by using the layer mask
feature. While this is enabled for any Adjustment Layer, it's often
easier to see what you're doing if you turn the mask overlay on and you
do this by clicking the Mask Overlay Toggle for that layer in the layers
palette in Paint Shop Pro or, in Photoshop you can press the \ key. As
with any mask you can now paint in black paint to remove the effect from
a part of the image – painting in black removes the red mask overlay
which is indicative of the application of the layer adjustment to that
layer.
To apply the adjustment to a
part of the image which is not currently affected by it, you paint with
white – this paints the ruby overlay onto the image and applies the
adjustment to that area of the image. If you want to only partially
alter the effect – for example to tone down the effect on a part of the
image, paint in grey – this removes some of the effect and you will see
the ruby overlay changes in opacity when you do this.
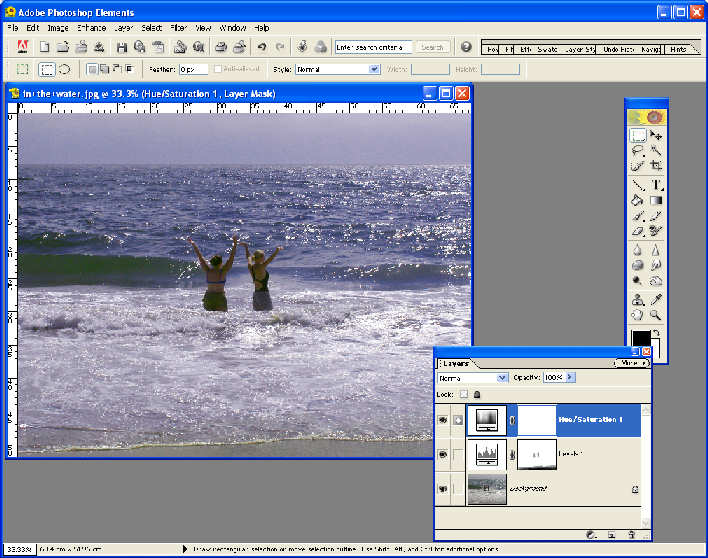
Adobe
Photoshop Elements has Adjustment Layers which affect all layers below
and which can be edited with masks.
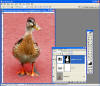
This
Photoshop Adjustment Layer shows the mask overlay which makes for easier
editing of the effect.
Working
with Adjustment Layers
Here are some layer effects in
Paint Shop Pro which show you some of the variety of techniques you can
use with Adjustment Layers in your images.
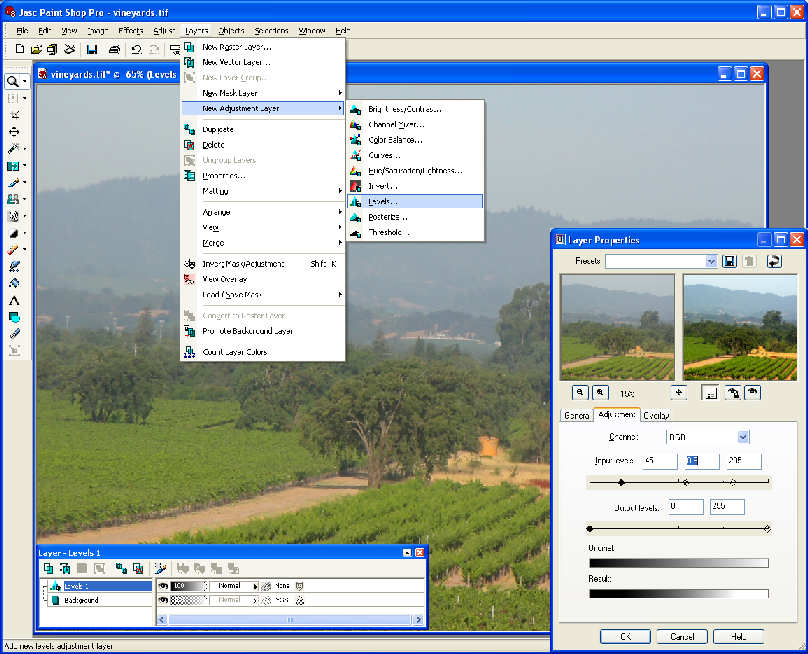
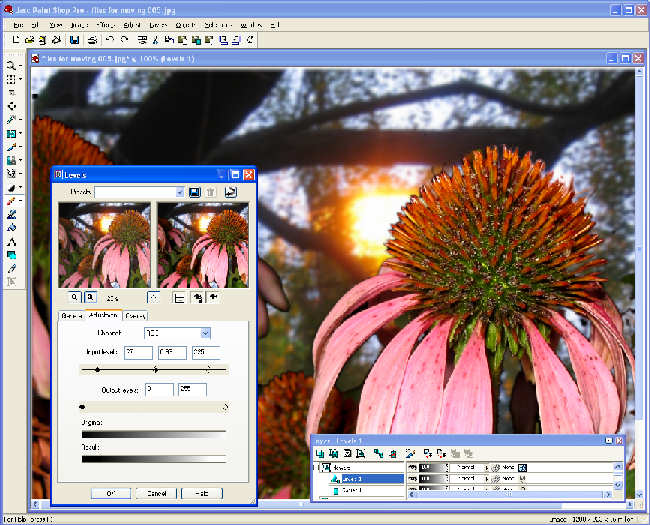
1
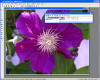
 To
apply an Adjustment Layer to this image choose Layer, New Adjustment
Layer and choose the layer type. Then make your choice in the Layer
Properties dialog – what settings are available will be determined by
the adjustment you’re making. To
apply an Adjustment Layer to this image choose Layer, New Adjustment
Layer and choose the layer type. Then make your choice in the Layer
Properties dialog – what settings are available will be determined by
the adjustment you’re making.
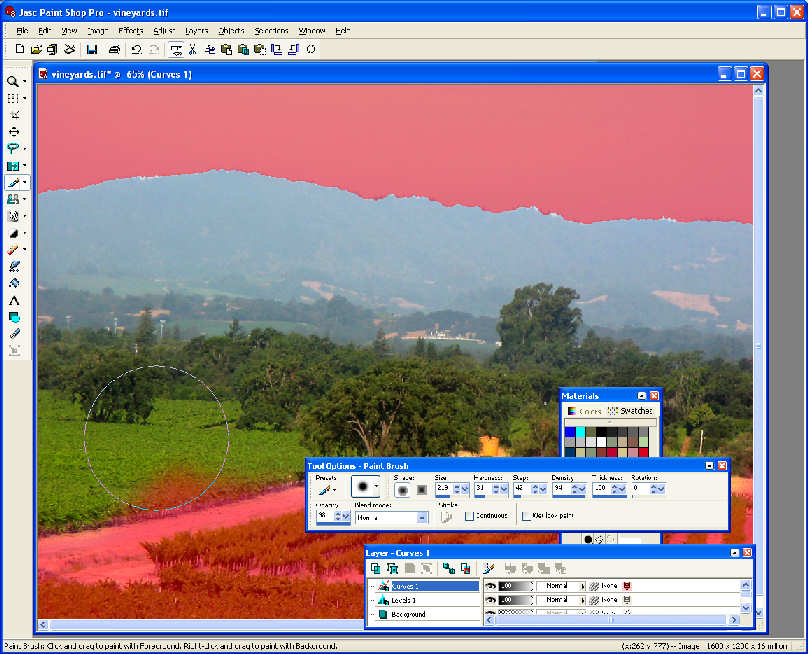
2
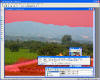 To
adjust how the image is affected by an Adjustment Layer, click the Mask
Overlay Toggle and paint with black to remove the effect, grey to tone
it down and white to add the effect back. When you're done, click the
Mask Overlay Toggle to check the results. Remember to paint on the
Adjustment Layer and not the image itself! To
adjust how the image is affected by an Adjustment Layer, click the Mask
Overlay Toggle and paint with black to remove the effect, grey to tone
it down and white to add the effect back. When you're done, click the
Mask Overlay Toggle to check the results. Remember to paint on the
Adjustment Layer and not the image itself!
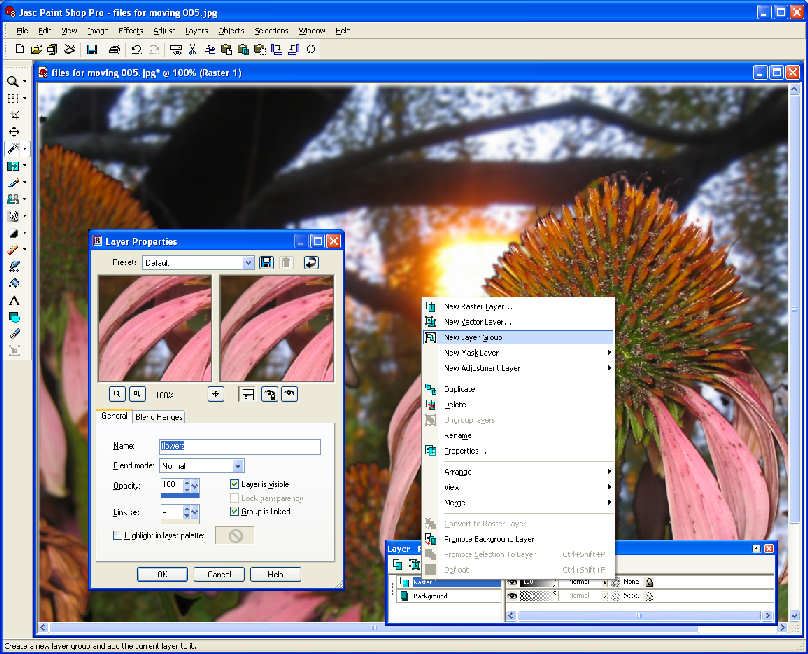
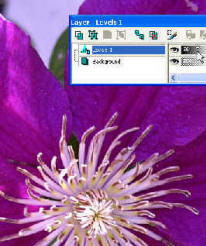
3
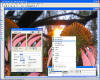 To
create a Layer group in Paint Shop Pro, choose Layers, New Layer group
and give the group a name. You can now drag layers into the group by
dragging and dropping them in the Layers palette. To
create a Layer group in Paint Shop Pro, choose Layers, New Layer group
and give the group a name. You can now drag layers into the group by
dragging and dropping them in the Layers palette.
4
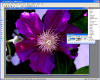
 To
configure an Adjustment Layer to affect a group (and not the entire
image), click the top layer in the layer group and choose Layers, New
Adjustment Layer and then choose and configure the effect. Only the
layers in the group are affected by the Adjustment Layer. To
configure an Adjustment Layer to affect a group (and not the entire
image), click the top layer in the layer group and choose Layers, New
Adjustment Layer and then choose and configure the effect. Only the
layers in the group are affected by the Adjustment Layer.
5
 You
can also change how strong the Adjustment Layer effect is on the image
by using the Opacity slider in the Layers palette to reduce it from 100%
opacity down to 0% - which is the same as hiding the layer as it totally
removes its effect. You
can also change how strong the Adjustment Layer effect is on the image
by using the Opacity slider in the Layers palette to reduce it from 100%
opacity down to 0% - which is the same as hiding the layer as it totally
removes its effect.
6
 To
create interesting effects with your photos, you can use different blend
modes with the Adjustment Layer. Some of these strengthen or tweak the
effect and some make more unusual changes to the image. To
create interesting effects with your photos, you can use different blend
modes with the Adjustment Layer. Some of these strengthen or tweak the
effect and some make more unusual changes to the image.
(c) H
Bradley, 2007-2009 |