Math in Word Tables
Helen Bradley
Word tables can do basic
calculations so you can use them as a basis for invoices and other
documents containing calculations.

When you think calculations you
probably think first of Excel and that is as it should be. However, when
the calculation is required inside a document, you might prefer to
create a table in Word and then, have Word do the math for you. Here I'll show you how you can create formulas in Word tables to make
calculations and also how to create custom table formats that can be
applied to new tables. You will also see how to create a preformatted
table and insert it into a document with one simple keystroke.
Custom formats
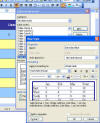
Last month you saw how Word
could automatically format tables for you. To do this you click inside
the table and choose Table, Table AutoFormat. The Table AutoFormat
dialog offers a series of preformatted table options – when you click
one, a sample of the format appears in the Preview area. When you find a
format you like, you'll configure the options for extending the format
to the heading row, last column, first column and the last row and then
click Apply to apply the format to the table.
If this format is one you want
to use for all other tables by default, click the Default button. You
will be asked if the table format is one you want to apply to all new
tables created in the current document or for all new tables created in
documents based on the current template – generally this is Normal.dot.
Choose your desired option and click Ok to apply your choice.
You can use the options in this
dialog to configure your own table format that you can apply in future
to your tables. Let's see how this can be done. Assume you want a table
that has no vertical borders and only horizontal lines but it should
have a border all around it. The top row is a heading row and it should
have white text and a navy background. The remaining rows should
alternate between pale yellow and pale blue backgrounds with regular
text. The text in the first column and the heading row should appear
formatted in bold type. The text in the table should be centred
vertically in the cells.
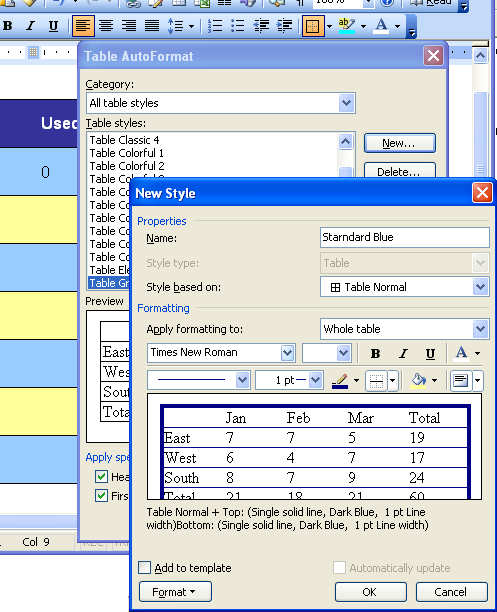
To start, choose Table, Table
AutoFormat, click New and type a name for the Table style. Make this
descriptive of the table, for example, Standard Blue. Select a table
style to base yours on - it's best to choose a simple style in case
other styles are altered later on - any changes to the style you base
yours on would then percolate through to the style you're defining. A
good choice is Table Normal as it has no lines and no text formatting
and you're unlikely to alter it later on.
Now determine which of the
formats you'll configure first. To configure the table borders, set the
Apply formatting to option to Whole table and configure the line option
to the colour and size to use. Now click the All Borders button and
choose Outside Border and Inside Horizontal Border to set these on. If
you want different weight or colour borders, configure these options one
at a time setting the colour and line option before you select each
border type. You can also configure the alignment to Align Center Left
while you are formatting the whole table.
When creating an AutoFormat you
must define the line features before creating the line itself.
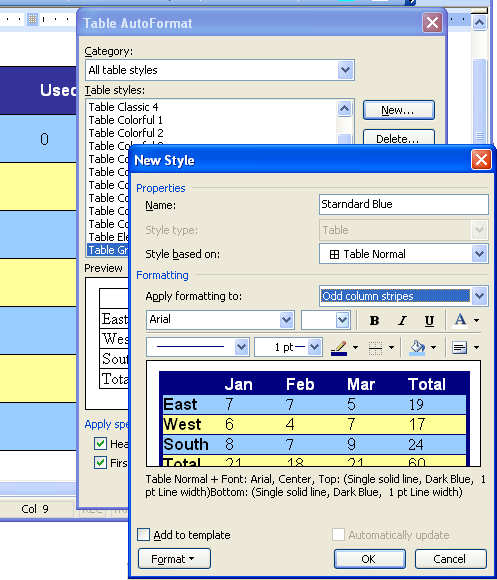
To format the top table row,
from the Apply formatting to dialog choose Header Row and format it with
a blue fill, white and bold text using the buttons in the dialog.
To format the stripes, choose
Odd Row Stripes from the Apply Formatting to dropdown list and configure
these to a light blue fill. Select Even Row Stripes from the Apply
Formatting to drop down list and configure these to a light yellow fill.
To configure the first column choose Left Column from the Apply
Formatting to list and then set it to bold type.
To make the new table format
available to all new documents based on the current template - this
template is most likely to be Normal.dot - click the Add to template
button. Click Ok and then Apply to apply your format to the table.
If you need to make changes to
the format at any time, choose Table, Table AutoFormat and select your
table format in the list and click Modify to alter it. Ensure you check
the Add to template checkbox so the changes are recorded for all new
documents based on Normal.dot template.
It is easy to format alternate
rows or alternate columns automatically using your custom AutoFormat.
If you receive a table formatted
using a table autoformat from another user you can add the format to
your own Normal.dot file. To do this, open the document and click in the
table. Choose Table, Table AutoFormat and click the name of the table
format in the list. Choose Modify and then click the Add to template
button and click Ok and then Close. While you haven't modified the
format it's now included in your Normal.dot template and will be
available to all new tables you create using that template.
Instant table insertion
While custom formats are one
automatic table creation option, there are others. It is possible to
create a table and to insert it into a document using something as
simple as AutoText, for example.
This technique works well when
there is a table layout that you use repeatedly, which has a particular
size, number of columns and even a fixed table row height. When you
create the table as an AutoText entry you can insert it very quickly
whenever you need it.
To do this, start by creating a
new table with the number of rows and columns you will include in all
tables of this type. Add any text to the table that will always be
included in this table – if there is none, simply leave the cells blank.
You can also include formulas such as one that totals the cells in the
final column, see elsewhere in this column for details on writing table
cell formulas.
Format the table cells the way
you want all the text in those cells to appear. To do this, you'll need
to consider the type of data that will go in the various cells and
format the cells in advance. If it helps, place some text in the cells,
format the cells using styles and then remove the text – the table
formats will remain in place. Also add shading and borders, as required,
to the table to control how it looks. You can also adjust the table cell
heights as needed, in particular if you want the table cells to be a
certain height regardless of the amount of text in them.
When you are done, select the
table by clicking in it and choose Table, Select, Table. Choose Insert,
AutoText, New (or press Alt + F3), type a name for your table and click
OK. This adds the table AutoText entry to the Normal.dot template.
In future, to create a table
with these exact specifications, type the name you gave to the table and
press F3 – you can also choose Insert, AutoText, select the table name
from the list and press Ok to insert it into your document.
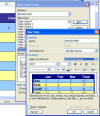
Labelling tables
When your document includes a
number of tables it is useful to number or label these so you can refer
to them in the text. To do this, use Word's caption feature by selecting
the table (Table, Select, Table), then right click and choose Caption
from the shortcut menu (this option doesn't appear unless you have the
entire table selected). The caption will appear automatically but you
can configure a different label if desired by clicking New Label and
type a new label to replace the word "Table" in the caption. To remove
the label from the caption, click the Exclude label from caption
checkbox. From the Position list choose where the caption should appear
relative to the table – above or below it. Click Ok to return to the
document.
The numbering for captioned
tables will vary when you add other tables before them in your document.
Because of this, if you're likely to add more tables to the document in
future use cross references to the table in your text when referring to
the table and then the cross reference will update automatically when
new tables are added.
Convert text to a table
It is possible to convert
existing text in a document to a table. However, to do so requires the
text to be correctly laid out – if it is not, it might be worth a few
minutes work to reformat the text so it can be converted easily to a
table. The requirement to convert text to a table is that the text
columns be separated by a single tab and that you have a paragraph
marker at the end of each line. While the latter is generally the case,
the former may not be. To reformat your text, click the Show/Hide
button on the toolbar so you can see the tab marks in the document (they
are small right pointing arrows). Ensure there is only one tab marker
between each item in the list.
When this is done, select the
entire list and choose Table, Convert, Text to table. The number of
columns should be automatically recognised and the Tabs option should be
the selected option in the Separate text at area of the dialog, if not,
make these selections. Click Ok and the text will be arranged in a new
table. You can now apply a format to the table as required – in
particular you may need to adjust the column widths so the data looks
attractive.
Cell spacing
When you enter text in a table
you may prefer want additional space above and below your text than
appears by default. While you can make the table cells larger and centre
the text in the cells vertically this is a somewhat cumbersome solution
and there is another way.
To add extra spacing, alter the
table's cell spacing values. To do this for the entire table click in
the table and choose Table, Table Properties, Table tab. Click the
Options button and you can now set the top, bottom, left and right cell
margins – setting the top and bottom to 0.25cm will give a little extra
space above and below the text in a table cell. In a similar way you can
alter the cell margins for one cell by clicking in the cell, choose
Table, Table Properties, Cell tab, click Options, disable the Same as
whole table option and configure the setting for this cell.
Calculations in cells
When a table contains values,
you can perform math calculations on these values. To do so, you need to
know the table cell references. In last month's column I introduced a
macro called TableCellHelper that will tell you any table cell's
reference. Basically the cells are labelled like a worksheet by the
column number and row letter. The top left cell is A1, the one to its
right is typically B1 and the one below it is A2. Where this numbering
system comes crashing to a halt is when you have merged cells. However,
with the TableCellHelper macro you can check a table cell if you're
unsure.
The step by step examples show
some typical table cell calculations. A file containing these examples
called tablecalcs.doc is on the cover disk for you to experiment with.
Calculating using table cells
With a table of numbers you can
perform calculations using Word table formulas. Here is how to build
your table cell formulas:
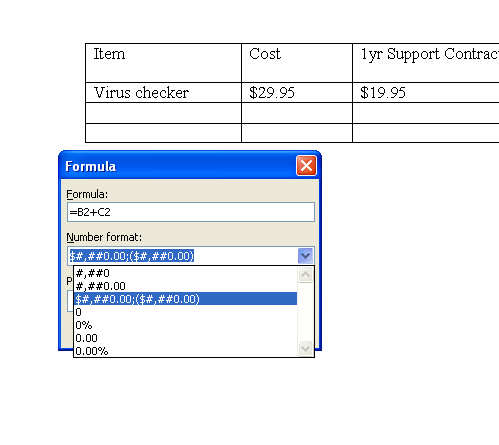
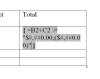
Step 1 – Simple addition
With one value in cell B2 and
another in cell C2 you can total the result into cell D2. Click in cell
D2, choose Table, Formula and type =B2+C2 in the Formula area. Select
the desired format from the Number format list and click Ok.
Step 2 – Understanding formulas
While you can type =B2+C2 in an
Excel cell, you can't do the same thing in a Word table. A table formula
must be entered using the Table, Formula menu command or added as a Word
field. To see the field code that underlies a Word formula click on the
formula and press Shift+F9.
Step 3 – Write your own field
code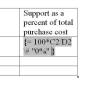
It is possible to write Word
formulas by hand if you wish to do so. Click in the cell and press
Control + F9 to add the field code braces. Now type the formula into the
cell, for example, this calculates the percentage of the value in D2
that the value in C2 represents: = 100*C2/D2 \# "0%" When you're done,
press Shift+F9 to see the result.
Step 4 – Recalculating formulas
Unlike an Excel worksheet, Word
formulas don't automatically recalculate so an incorrect result will
appear in a cell until you force a recalculation. Error messages also
continue to appear even after the problem is fixed. To force a
recalculation or to remove an error message, click on the formula's
field code and press F9.
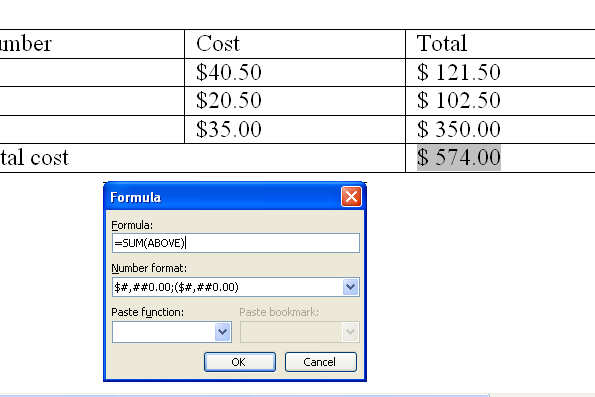
Step 5 – Summing a column
To sum a column of values in a
Word table, click in the cell that should contain the answer and create
a formula using either the Control + F9 or Table, Formula method that
uses the function =sum(above).
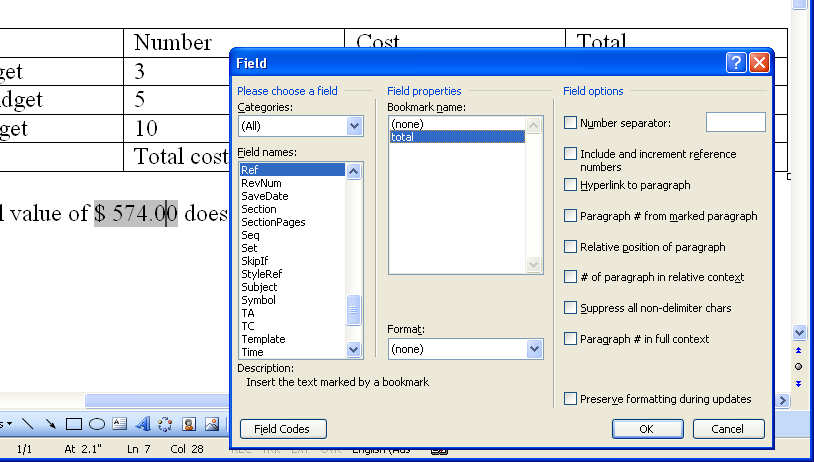
Step 6 – Referencing cells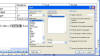
It is possible to reference a
cell in a table outside the table. To do so you must first create a
bookmark for the value by selecting the entire field code in the table
and choose Insert, Bookmark, Name, type a name and click Add then Close.
To refer to the value in your text, click at the point to include the
value and choose Insert, Field, from the Field names list choose Ref and
select the bookmark name you created.
Article first published in Australian PC User
magazine
(c) Helen Bradley 2007-2009
|